Adding sound effects to your project will not only bring your creation to life quicker, but also shapes the creative direction.
Adobe Premiere Pro is a well known video editing software program. Although this software is not free, the learning curve and navigation of Premiere Pro is extremely manageable for beginners. Whether you are just starting out in the world of video editing or you want to level up your expertise with some new tips, mastering these three Adobe Premiere audio effects is a good place to start.
This guide will help familiarize you with some of the useful effect tools within Premiere and show you how best to take advantage of your Adobe Premiere Pro subscription by helping your audio shine through.
1. Reducing Reverb
Reverberation -or “reverb” for short- is when a sound persists after being produced, such as when someone speaks in a large room and a slight echo can be heard. Sometimes this effect is used intentionally in film to produce the feeling of a large space, but oftentimes reverberation on dialogue is not something you want interfering with your video production.
To adjust reverb in Adobe Premiere Pro, find the ‘Effects’ tab and select ‘Audio Effects’. When you click on ‘Reverb’ you can drag the effect to the desired clip in your timeline. In the tab labeled ‘Effect Controls’ you will find options to the right of ‘Reverb’ that help adjust the sound to a more desired feel with options such as “small room”, “large room”, or "church".
2. Reducing Background Noise
While watching a video, background noise can be the cause for all sorts of distractions and problems for the audience. When trying to minimize background noise in your production, you should first begin by controlling the setting during filming. However, keeping the sound of other voices, wind, and general unwanted sounds out of your video can sometimes not be avoided. Although you should always consider hiring a professional audio editor for your fim, the denoiser in Premiere Pro can be your first step to reduce unwanted background noise.
To access this feature, select ‘Effects’ in the menu bar, then select ‘Audio effects’ in the drop down menu were you will find ‘Denoiser’. Once you have selected it, drag the denoiser effect to the clip in your timeline just as you would with the ‘Reverb’ effect. You can manage the denoiser in ‘Effect Controls’ under ‘Edit’- this will allow you to customize the denoiser.
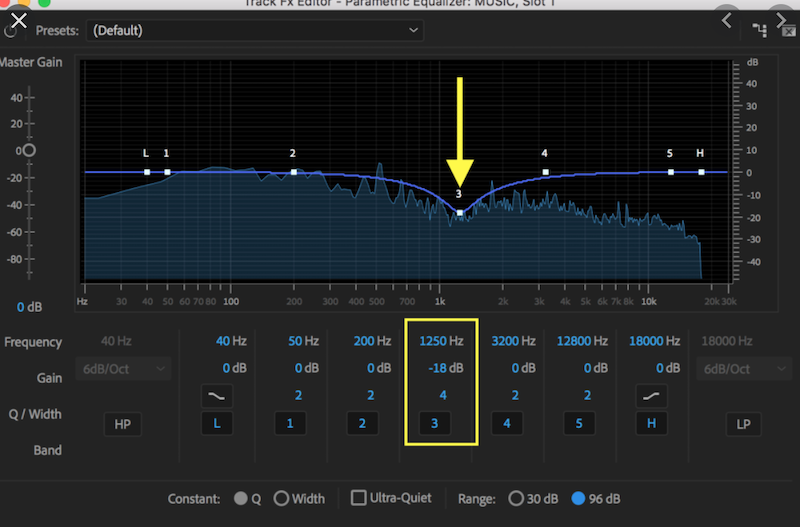
3. Equalizer
The equalizer feature in Adobe Premiere Pro is an excellent way to add professional finishing touches to your work. There’s a few things you can do with this effect but most importantly, it has the ability to equalize the audio levels between separate clips to create a more cohesive and clean audio experience.
To use the equalizer, go to ‘Effects’ and find ‘Equalizer’ under ‘Audio Effects’. Once you drag the feature to the timeline, you have the option to customize the bass and loudness among other options.
The was you edit the audio in video is an important factor that brings the entire production together. With the proper tips on how to navigate Adobe Premiere Pro, it is possible to make your audio sound much more sophisticated. These three audio effect features are a great place to start when looking for ways to enhance your Adobe Premiere Pro audio quality!
As you're editing your video you may consider adding key sound effects to embellish your story such as a door closing off screen you didn't capture the audio of during production. Sound engages your audience and helps bring your story to life.
Once you've acquired your sound effects – we recommend SoundQ – it's as simple as dragging and dropping them into your project timeline in Premiere.
As always, remember that you can edit your sound effects further by manipulating the reverb & EQ, rendering them more unique and individual.
If you'd like to learn how to incorporate sound into different platforms check out some of our other blogs: