
An all-inclusive guide to adding audio to your Google Slide presentations.
When developing a presentation, few creators think to add a sound component to their Google Slides. This simple action can bring a presentation to life, engage your audience, and make your message easier to comprehend. It is easy to add sound (such as music or voice over narration) to Google Slides. Below you will find a step by step guide of how to add audio to your next presentation.
1. Uploading the Local Audio File to your Drive
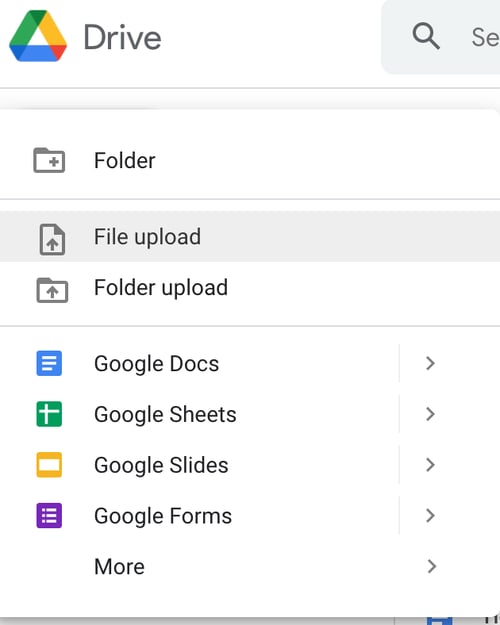
Before beginning, it is important to note that the only file types that Google Slides supports are MP3 and WAV audio files. To add a local MP3 or WAV file to your presentation from your computer, begin by uploading it to your Google Drive by opening ‘New’ and clicking on ‘File Upload’.
2. Embedding the Audio into your Google Slides Presentation
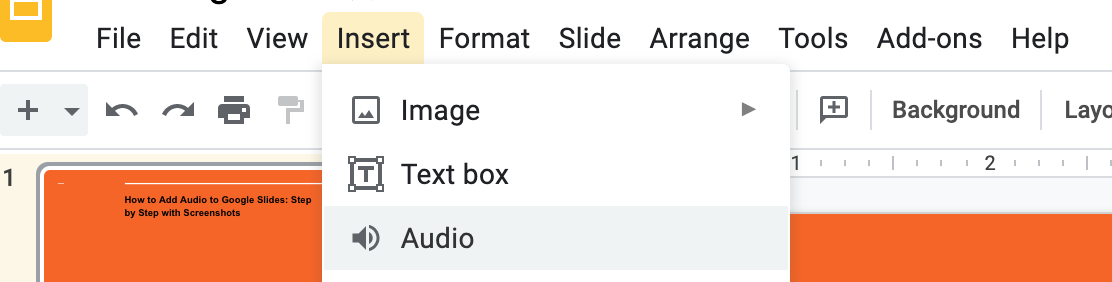
Once you have opened the presentation, select ‘Insert’ on the top menu bar and select ‘audio’. Lastly, find the file and click ‘select’ and your selected audio file will be embedded in the slide that you chose. 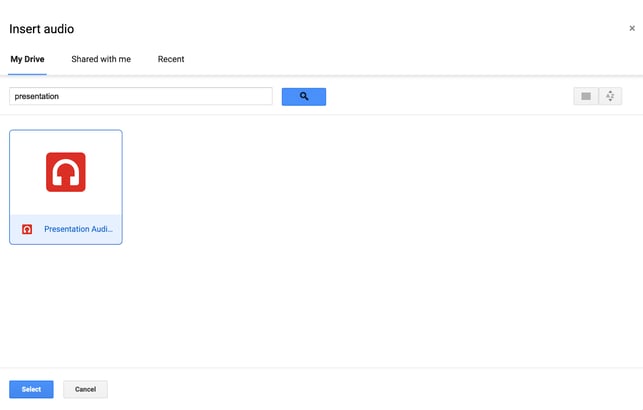
3. Adjusting Audio Features in Google Slides
Once the audio has been added, an icon will appear on the slide in the shape of a megaphone to show that it has been successful. Clicking on this icon will open ‘Format options’ for your audio on the right hand side of your Google Slides presentation.

Under ‘Audio Playback’, you will see the option to have the audio start playing ‘on click’ or ‘automatically’. Choosing the automatic option begins the music as soon as the slide comes up and eliminates the need to click on the sound icon during the presentation. Another option in the formatting section include ‘hide icon when presenting’ which both creates a cleaner look and makes sure the sound icon does not take up valuable space on the slide. For a sound effect or voice over, be sure to choose ‘Stop on Slide’ to avoid the audio from looping.
Conclusion
Sound effects create an interesting aspect to slideshows that will draw in the viewer and even help clarify a point. Using the audio feature in your presentation is simple but it is important to remember what file type you are trying to upload. Before uploading double check to make sure it is either an MP3 or WAV file that you are as those are the only ones that will work in Google Slides. From there, you can use this step by step guide to assist you and have an awesome presentation in no time. Whether it is a short sound effect, a lengthy voice narration, or even just your favorite song; you can add audio to the Google Slides presentation with a few easy clicks.