Learn the ins and outs of using Reaper to supplement your Pro Tools workflow – from a Pro Tools user perspective.
Though Pro Tools remains the industry standard DAW in the world of audio post production for sound editing and mixing, many sound artists have taken an interest in Reaper as a sort of “sound design sandbox” due to its powerful and flexible features.
One such sound artist is Bob Kellough (Spider-Man: Homecoming, Justice League). We asked Bob to share some tips and tricks for making sense of Reaper coming a Pro Tools background.
I’ve been using Reaper as a sound design DAW for the past few years and have found the transition from Pro Tools to be initially challenging but extremely rewarding.
The challenge was not due to inadequacies in Reaper (it is an extremely robust DAW) but more so in its GUI after years of working in Pro Tools.
So while this is by no means an exhaustive list of features, here a few things Pro Tools user may find useful in Reaper (and where they are located).
Let’s start with a seemingly simple menu with a few powerful sets of features:
1. Media Item Properties
The ‘Media Item Properties’ window in reaper allows you to edit the clip name, Fade in, fade out, cross fade, Pitch, length change, non destructive reverse, volume and clip effects. All nondestructively. To call up this window simply double click on the item. Voila! Nondestructive clip manipulation is now at your fingertips.
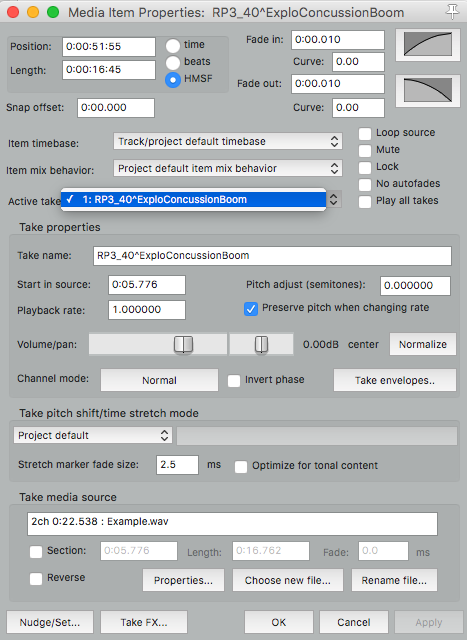
2. Pitching and Playback Rate.
Again, these tools are within the Media Item Properties window.
Playback rate is just that, faster or slower. If you adjust the rate it will speed up or slow down the media once you update the window by clicking ‘apply’. By default the ‘preserve pitch when changing rate’ is checked. This will change the playback rate without changing the pitch. If this unchecked the pitch will raise or lower according to playback speed.

Pitch will adjust the pitch of the media while not adjusting the playback rate. Again, both of these commands are non-destructive and can be performed in real-time.
Note: Another little gem about Reaper is it comes bundled with its own plug-ins one of which is a powerful pitching tool called “ReaPitch”. It is listed in the fx listing and not only adjusts semitones and cents but also formants. This can be applied as a clip effect or on a track.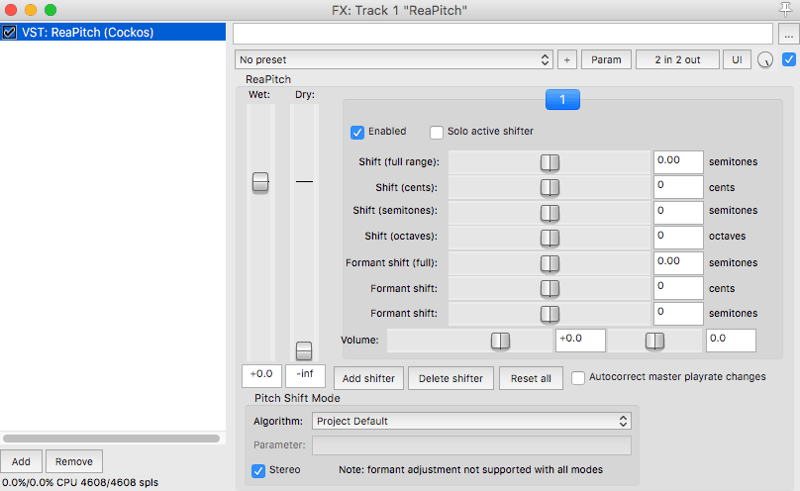
3. Nondestructive Reverse
This is also located in the Media Item Properties display. Simply select a piece of media, pull up Media Item Properties and reverse. If you select the ‘section’ it will reverse only section edited in the timeline. If ‘section’ is not selected the entire media item will reverse. For example, if there is a 1 minute clip and 10 seconds of that clip is in the edit, reversing that section with ‘selection’ ticked will only reverse the 10 seconds while unticked will reverse the entire piece of media.
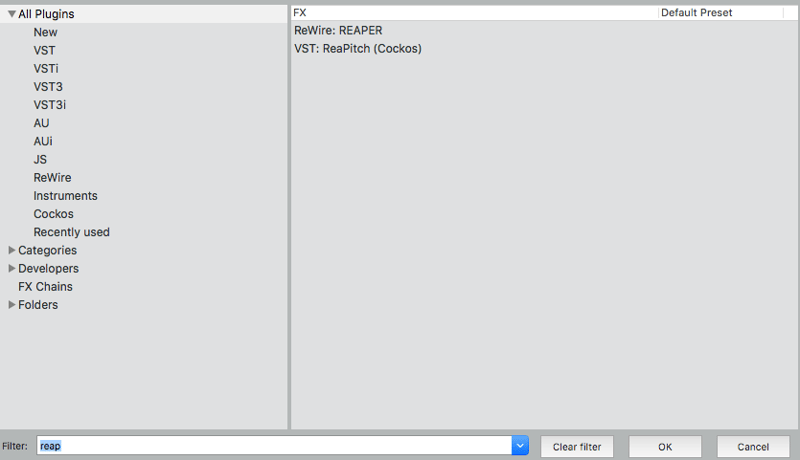
4. Take FX
Clips based effects in Reaper are effects that can be added to a clip of media in real time, no rendering. Effects can be layered and manipulated while Reaper is in playback. An effect is selected from your VST and AU plugins, including plug ins that come bundled with Reaper. To find this locate take effects on the lower left of your Media Item Properties menu. Click on this and a list will be present with loaded VST and AU fx. You can scroll down the list, or type and search for plugin.
5. Instantly Convert Any Track to an Aux
Ok, getting away from the Media Item Properties for a minute let’s talk bussing. Within the edit menu is a powerful small folder icon. Selecting this will turn any track into an aux being fed by tracks below it instantly. No need to create a bus on the IO page, click this and you’re done. I find this very useful for creating quick groups that will be bundled together for compression, eq, verb, etc. The tracks are just as easily split apart by deselecting the folder icon or clicking and dragging a track out of the newly created group. There is a more sophisticated routing systems also built into Reaper where tracks can be re-assigned outputs on the fly. Beyond the scope of this quick overview but worth looking into within the Reaper manual.
6. Multiple Project Windows
Multiple project tabs with no track count limitation. One project for one idea, another for a second idea, perhaps a third for midi instruments. However you want to break it up, Reaper is very flexible with this. This command is located under the file menu – new project tab.
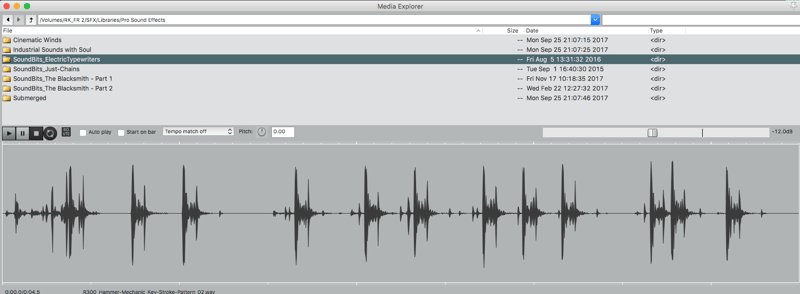
7. Media Explorer
Reaper uses this window similar to pro tools workspace. As a user the interface is simple to use and intuitive. Locate your drives / partitions and type in what you are looking for. Reaper will begin the search while you are typing and it is FAST. Not only can you audition clips in this window but also can have monitor fx enabled (top right) adjust play back speed, highlight and inserts clips directly to your Reaper timeline AND drag clips into your Pro Tools timeline. You heard right. Not only that but drag to your desktop. It’s pretty slick for those FX you know exist in a session from last year but is still labeled “Audio 3_rev”. Reaper can help you find it quickly. To pull up this window you can select it under “View”.
8. Price (AKA Brass Tacks)
Reaper is offered at two price points: $60 and $225 – the first for personal use, and the second for professional. Please refer to the Reaper website for specifics and end user agreement. For the price I find Reaper – a fully functioning DAW with powerful editing capabilities, flexibility and midi interactivity (future article) … not to mention Ambisonics capabilities – to be nothing short of excellent.
Oh – did you I mention you can assign your own key commands to any function? Or choose your own theme? Or the program is small enough to fit on a thumb drive?
I would also like to mention that Dave Farmer has many Introduction to Reaper YouTube videos that are extremely useful. And the Reaper manual is helpful and straightforward.
I hope you found these few initial pointers useful. And have fun exploring Reaper!

Bob Kellough is a supervising sound editor/re-recording mixer working on some of the most popular films and TV shows, including Justice League, Loving, and Spiderman: Homecoming.
Follow Bob Kellough: IMDb | Twitter