
Learn how to identify and troubleshoot these common sound problems to boost the quality of your YouTube videos.
As a creator on YouTube, you already have a checklist for everything that goes into making a great video:
- Engaging content? Check.
- Striking visuals? Check.
- Impeccable sound? …if you hesitated for a moment there, you’re not alone.
Audio should not be an afterthought in your YouTube workflow though, and we have some troubleshooting tips to help you level up your audio game.
1. Clicks and pops
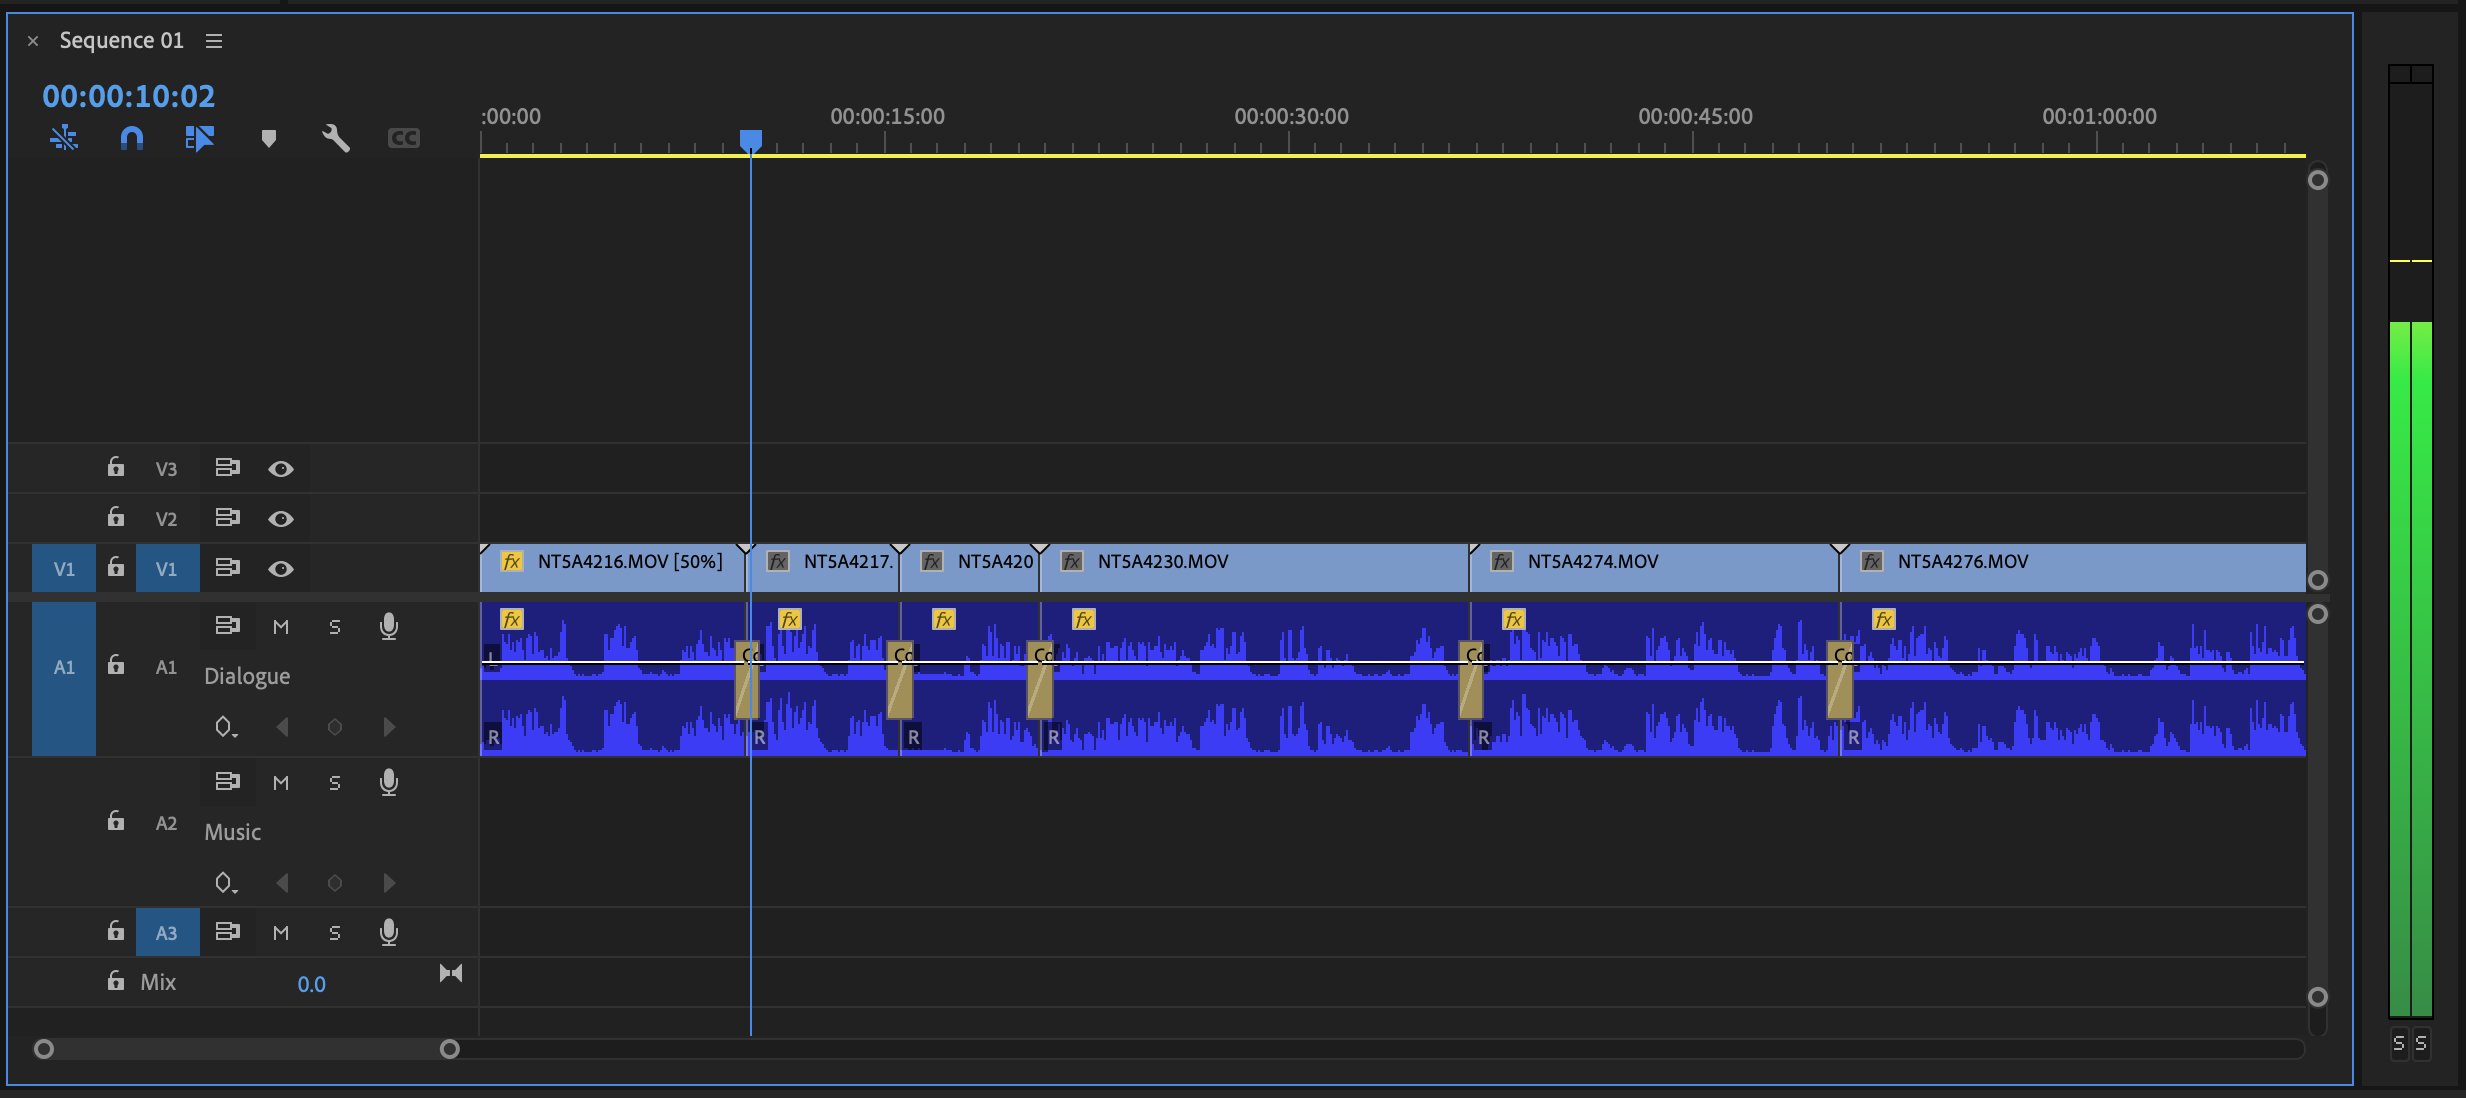
Some call them clicks, some call them pops. Either way, this is an audio issue you definitely want to avoid in your videos. Just to clarify, when we say ‘clicks’ and ‘pops’, we’re not talking about artifacts that were picked up by the mic during the recording process and are baked into the audio recording. This is different. We're referring to a click that is audible in the edit when the playhead moves over a cut.
It’s the type of thing you can’t ignore once you become familiar with the sound. When you make a cut to a clip on the timeline and play the video back, you will hear the sound at the edit point between the two segments.
Solution:
Use a short crossfade transition between the two cuts. If there are stray clicks, you can just paste a transition on each individual cut. If you have a heavily edited video and come across a lot of clicks, just select all the edit points and paste a transition onto all of them at the same time. If there’s silence at the head or tail of the clip, you can manually add keyframes and insert a fade for greater control.

2. Distortion
Recorded your audio levels too loud? If so, you’ll now have to deal with distortion. You can have the best visuals out there – but if your video has distorted audio, it’s going to look amateurish. Even if you’re going for a totally casual, laid-back, vlog-style video, having distorted audio is a jarring experience for the viewer and is best avoided right from the start. So while clipped audio is surprisingly common in YouTube videos, it doesn’t have to be. All it takes is a little prep and you can avoid distortion altogether.
Solution:
Let’s consider two scenarios. In the first, you have a dedicated sound person on your team. In this case, they will be responsible for monitoring the audio throughout the shoot and you shouldn’t have a problem. But if you know there are going to be sudden loud moments in your video (for example, someone yelling) give them a heads up so they are prepared for it and can monitor accordingly.
In the other scenario, you’re recording your own video and you don’t have someone to monitor the sound. Setting the audio levels correctly is crucial in this case, and you should make sure you’ve done it properly before the shoot. As a guide, if you keep the levels between -10dB and -12dB, with peaks around -6dB, and stay away from 0dB at all costs, you should be fine.

3. Inconsistent volume levels
Watching a YouTube video with uneven audio levels can get really frustrating for your audience if they have to keep turning the volume up and down to fully understand what is being said. This sound issue is distracting and might annoy some people enough for them to simply click away from your video, and on to something else. The good news is that this is not a difficult problem to solve.
Solution:
Once you have your edit locked, play the whole thing back. Ignore the visuals and just focus on the audio. Then, adjust the gain of each clip to achieve consistency across the entire video. It may seem like we’re stating the obvious, but it really is as simple as turning the loud parts down, and the soft parts up. If you paid attention to our previous point and set the levels correctly while recording, you’re already off to a good start! In the edit, once you’ve evened out the gain on all the clips, listen back and see if you can comfortably listen to the video, without either straining to hear some parts or recoiling from extremely loud bursts of sound. You could use compression to achieve this as well, but manually adjusting clip gain first helps you achieve a good average level. You can add compression or volume automation later, in the mix, to further enhance the audio.
4. Unbalanced dialogue/music mix
This is related to the previous point and this problem can arise in two ways. One is when the video switches between dialogue and music sections with the dialogue being too soft and the music being too loud. The second manifestation of this problem is when you have dialogue over a bed of music but it is not mixed properly and it drowns out parts of the speech. The effect is the same: a video that is hard to understand and is not a good experience for the viewer.
Solution:
Just like the dialogue levels should be adjusted so that they are consistent, you have to make sure you listen to the entire audio track and adjust the music and dialogue so that they are uniform. If your video has a music underlay, you could duck the music under the dialogue using sidechain compression. Adjust the attack and release to make sure the transitions are smooth. A multiband compressor works well for this and provides the most natural-sounding transitions because you’re not drastically turning down the volume of the track. You’re carving space in the music for the dialogue by targeting competing frequencies. So when the music does fade into the background, the mix sounds less empty.
5. Off-axis coloration
You know when you’re watching a video and the subject turns their head to the side while speaking, and suddenly there’s a drop in the level of the dialogue? That is caused by the sound source moving off the mic’s primary axis. This results in a change in the quality of the audio because the mic's frequency response changes as the sound moves off-axis. Off-axis coloration is not a bad thing in and of itself, and it can be used to shape sound being recorded in a controlled setting. What we’re talking about here, specifically, is when dialogue becomes unintelligible because the subject turned their head and the mic didn’t pick it up clearly.
Solution:
You could try some EQ matching to get the audio to fit with the rest of the dialogue but honestly, especially if you’re working on a tight schedule, it’s easier to prevent this problem than to fix it in post. Choosing the right mic is the first step. An omnidirectional lavalier mic is very popular for interviews. It picks up sound equally from all directions, which is okay if you’re in a quiet place, but not so much if you’re in a noisy environment. If your subject is miked with a unidirectional lavalier mic, make sure it is as centered as you can get it. You want it to point at the speaker’s mouth. Too much to the left or right and you risk them going off-mic, especially if they move around. If you’re using an on-camera mic, have it point at the subject as much as possible, even if you’re following them around, so they stay within the pickup pattern of the mic.

6. Neglecting the use of sound effects
This is more of a creative issue rather than a technical one. A great edit with well-shot B-roll feels incomplete if you don’t utilize sound effects to underscore significant moments in the edit, like camera movement, product reveals, and lighting changes. For a good example of how to do this well, check out YouTuber Daniel Schiffer’s product videos. He does a detailed breakdown of each step in the production process with special emphasis on sound design. Once you watch the videos with sound effects, you will understand how empty they seemed without them.
Solution:
Make sound effects and sound design an integral part of your video post-production workflow. Selecting the right sound, for the right moment, and combining effects to create something unique might take longer than you originally budgeted so make sure to set aside extra time to do a focused SFX pass. Just like with music, make sure you use licensed sound effects. Software like SoundQ gives you access to high quality, royalty-free sound effects (and music) as well as the ability to organize your library, and send files directly to your timeline for a super fast workflow.
Final Takeaways
No matter what stage you are at in your YouTube journey, setting up best practices for sound is crucial to your channel’s growth. Even if you don’t have a big team and a dedicated sound person on board, you can equip yourself with the knowledge to tackle these issues and prevent them from cropping up by selecting the correct microphone, learning basic sound editing and mixing techniques and placing as much importance on the audio portion of the video as the visuals themselves.