
Speed up your sound design workflow using these Reaper shortcuts.
Reaper is well-loved by countless sound designers for many a reason: it's extremely fast, customizable, can mould to basically any workflow, and it's fairly priced.
It also has an insane number of features to it - so many that even veteran users like me are discovering new things about it every single day.
So, in this article, we're going to dive into some hidden Reaper workflows that you may not know about! These are sure to enhance or speed up your sound design workflow, so let's jump right in.
The first thing we're going to cover is parameter modulation
Reaper has an absolutely lovely feature that allows you to control many of your plug-in parameters in some really amazing, wacky ways.
This parameter modulation feature allows us to do things like:
- Attach LFOs to plugin parameters (such as pitch, reverb mix, or basically any other parameter a plugin has)
- Use an audio signal to modulate our parameters
- Or we can even adjust and move our parameters based off of MIDI input, or even have one plugin parameter control the parameter of another plugin, which gets pretty insane.
So, here's how to start modulating our parameters within Reaper. There are many many ways to get to this window, but here is just one.
(By the way, all the screenshots you see of Reaper here are using the theme Smooth 6. You can grab it here.)
First, we're going to make a track, and then add an EQ plugin to it. It doesn't really matter which plugin you use for this, but I'm using Reaper's built-in ReaEQ to keep things simple.
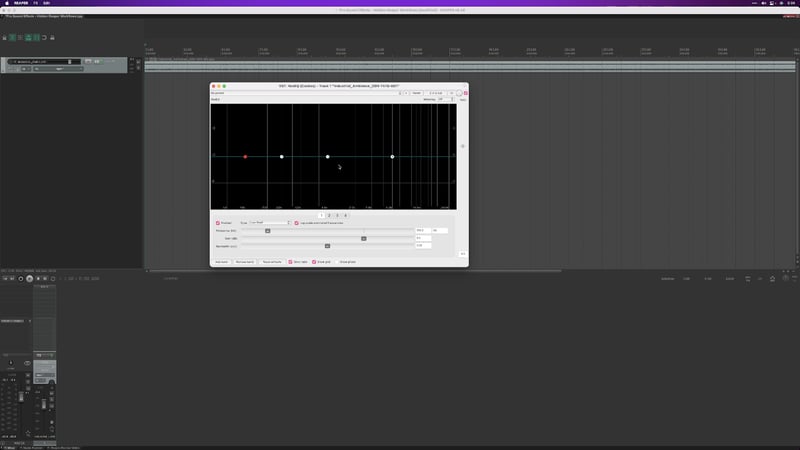
Then, let's say we want to automatically modulate our EQ bands based off of an LFO. In this case, let's say we want band 3 to sweep from left to right.
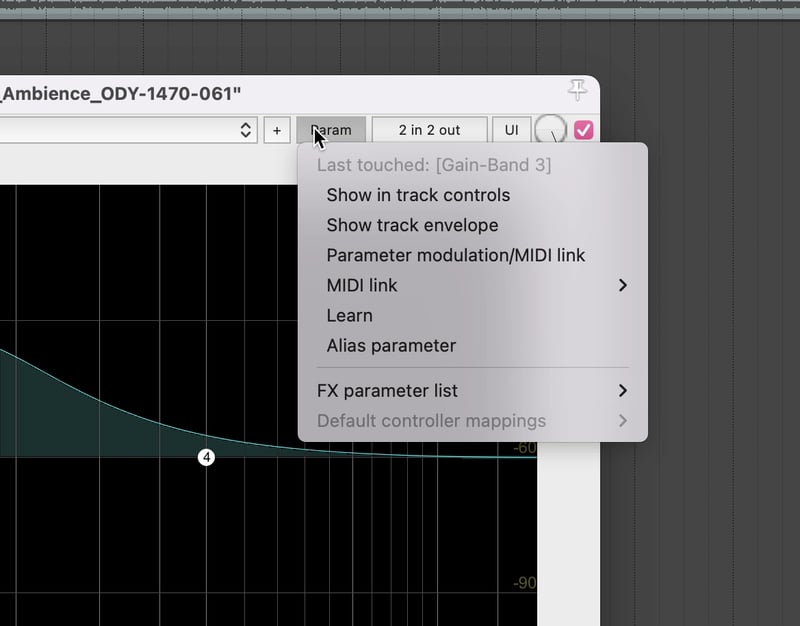
All we need to do is click the "Param" button at the top of our EQ plugin…
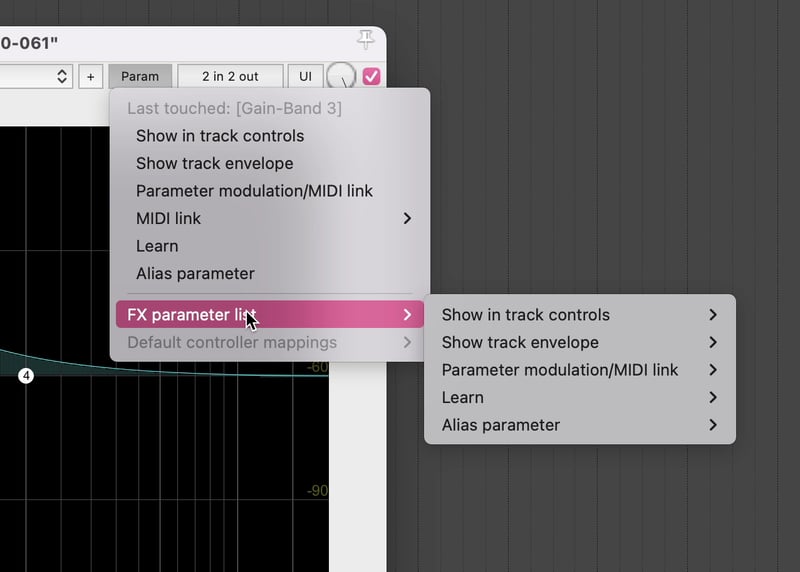
Hover over FX Parameter List…
And then choose which parameter we'd like to modulate. In this case, we'll be modulating the frequency of band 3, shown here as "Freq-Band 3"
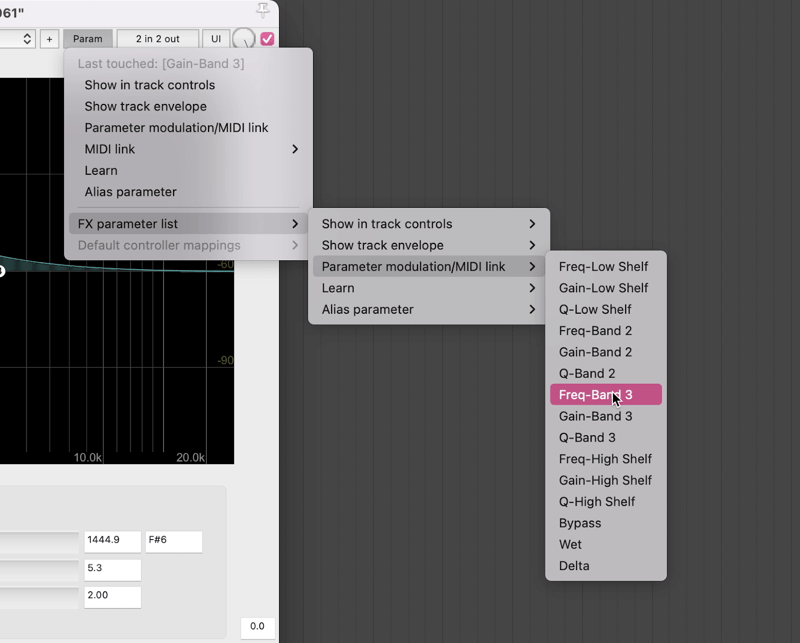
You'll see a new window pop up that gives you three options to choose how you want to modulate this parameter:
- Audio Control Signal (sidechain)
- LFO
- Link from MIDI or FX parameter
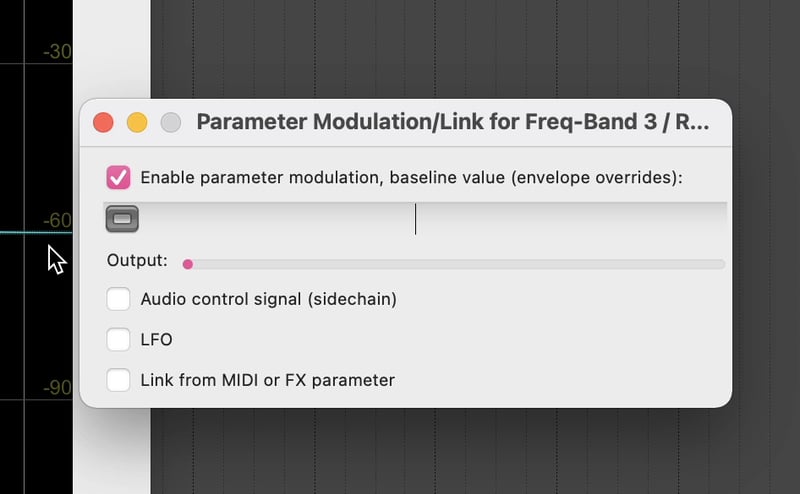
Let's click on LFO.
And as soon as you do that, you'll see our EQ band starts moving from left to right, controlled by an LFO. Here, you can change the shape, the speed, and every other parameter you may want.
And yes, you can modulate as many of the parameters in each of your plugins as you like. You can even combine methods of how your modulation occurs (you can have an LFO, an audio signal, and a MIDI data all controlling one parameter at the same time, if you wanted to!)
Note, that you can do this with pretty much any parameter in any plugin, allowing for some insane results.
While, in the interest of brevity, I only showed you the LFO parameter today, I highly encourage you to look into the other two parameter modulation options as well!
Explore world-class sound effects from award-winners, like the ambience that Akash is using for to demonstrate his LFO parameter, with Odyssey Essentials:

And now, let's dive into subprojects
Now, lots of Reaper users already know and love subprojects (and if you don't already, be sure to check out my Reaper for Game Audio series on Youtube).
And, for those of you who work in game audio, you know that sound design work is all about iteration. Sometimes, you may do dozens of revisions on some sounds by the time the game is complete.
If you keep all of these revisions just loosely hanging out in one project, not only could it use a lot of CPU power to process all those plugins and sounds at once, but the project will also become messy and hard to navigate.
Which is why I like to use subprojects within subprojects!
Here's how I like to break things up:
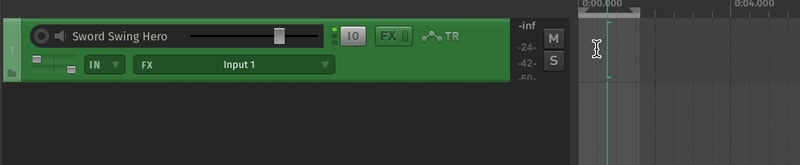
First, create a track for the sound you'll be working on. In this case, let's say it's a sword swing for our hero. I'll name the track "Sword Swing Hero"
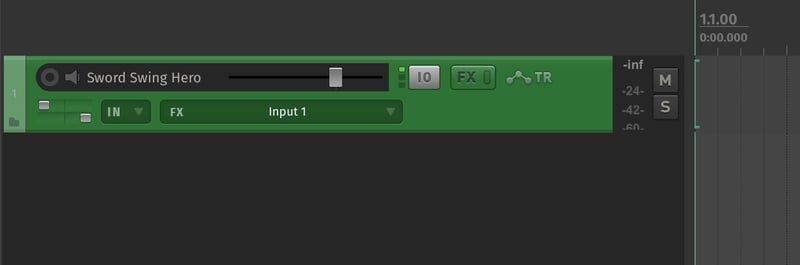
Then, I'll left-click and drag a small section of time on that track. How long this selection is doesn't matter for this demonstration - but we're basically choosing how much space we want our subproject reference to occupy.
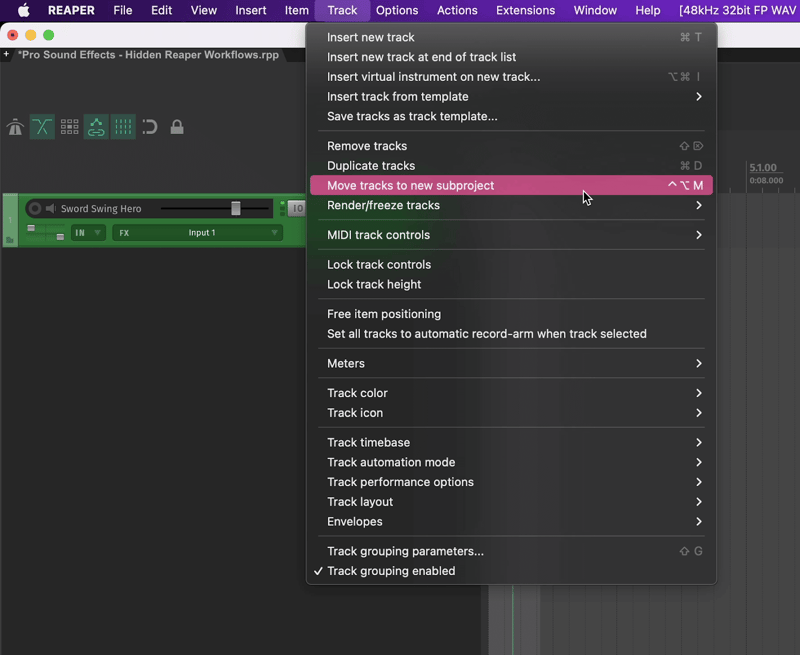
Once I've made my selection, I'll go to the "Tracks" menu in the top toolbar...
Then click the "move tracks to new subproject" command to turn the section I've highlighted into a subproject of the same name of the track - in this case, the subproject will be for the "Sword Swing Hero" track.
Then, within that subproject, I'll rename the first track "Sword Swing Hero V1" to indicate that this is the first iteration of that sound.

And at that point, I'll left-click and drag out a new section within this project on our Sword Swing Hero V1 track...
And then use the same "move tracks to subproject" command within this new subproject.
What this just did was create a subproject of Version 1 of our Sword Swing Hero sound within our overall Sword Swing Hero project.
Now, within the Sword Swing Hero subproject, I can create new tracks and sub-sub-projects for each iteration, titling them "V2, V3, V4" etc. as needed.
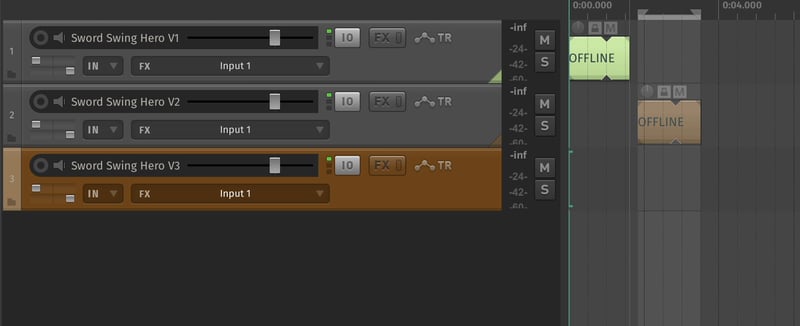
This way, my master project stays tidy and easily searchable without being cluttered with dozens of variations all at once.
I know many people use subprojects in radically different ways, so of course, do what suits you and your workflow best!
Next, let's get into exporting looping sounds
Reaper somewhat-recently added a feature to make our looping exports a little easier called "2nd Pass Render".
Those of you who use Logic or Ableton are likely already used to this feature, but here's how it works:
When you render (also known as bouncing and exporting) a file from Reaper using this setting, Reaper will play through the sound once first, and then export the 2nd playthrough of that sound.
Why is this so handy for loops? Well, I'm glad you asked!
Imagine if you had a looping sound that worked perfectly on its own. No effects, no nothing, just a nice, clean, looping sound. We could just export this and call it a day.
But, let's say we add some reverb to this loop. All of a sudden, if we render it, our loop won't be seamless, because all the reverb tail of the sound from the end won't be included in the beginning when the sound loops back around. There will just be an unnatural cut off at the start of the loop.
But, using 2nd Pass Render will export this file on the 2nd listen through, meaning we'll incorporate that reverb tail into the beginning of the file, leaving us with a seamless loop with our reverb nicely baked in.
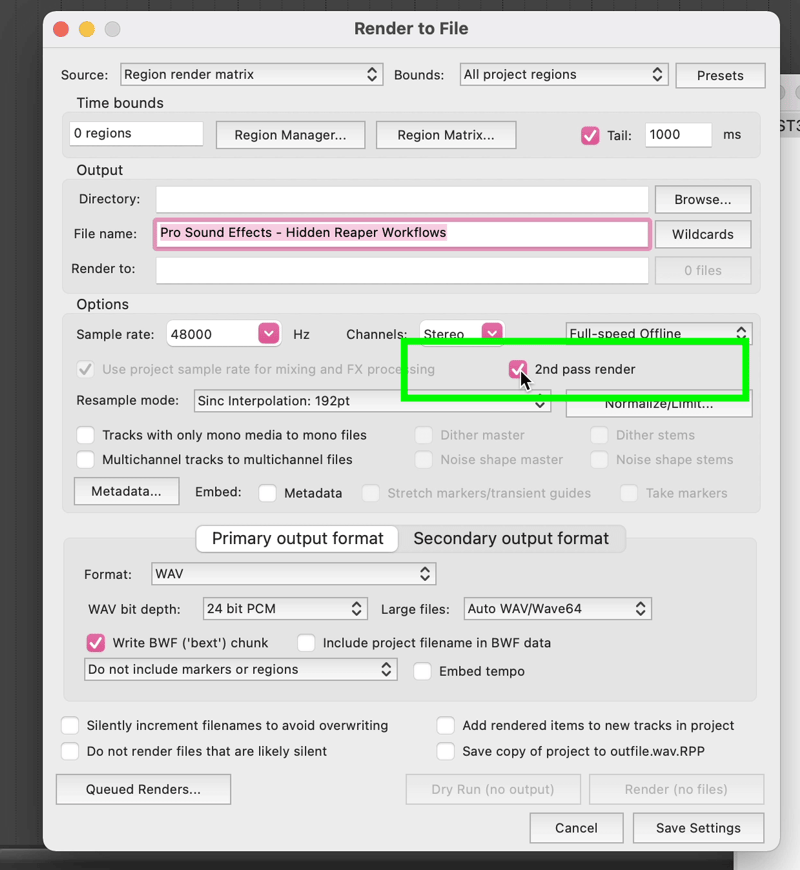
To access this, all we need to do is go to File -> Render…
And check the “2nd Cycle Pass” box, and you’re done!
Now, let's move on to finding our sounds quicker
Using the media explorer to search our sound libraries.
I personally prefer the built-in Reaper media explorer over any external audio library tools due to its convenience and speed.
And one thing that can make your searches for your sounds more accurate within the Reaper media explorer are the "AND", "OR" and "NOT" operators.
When you're searching for your sounds, you can add "AND" to make sure you're finding sounds with multiple parameters, or "OR" to broaden your search, or "NOT" to refine it more.
For example, I could search for "fire OR flame" to make sure I get both sounds with fire or flame in the metadata and title.

Or, I could search "Water NOT Fall" so I get some water sounds without bringing up a waterfall.
I could maybe even search "Explosion NOT distant" to make sure I don't pull up any distant explosion sounds.
This can really help us find just the right sounds from our library way faster.
Next up, let's talk about free item positioning
This is a fun little one that may seem like a bit of novelty at first, but can be really useful in some sound design cases.
Basically, what this allows us to do is move our audio and MIDI items around on each track totally freely without any restrictions.
This can be SUPER handy when you're placing sounds in really quick succession (maybe like footsteps, gunshots, or anything else that's repeated quickly) without wanting them to overlap or place them on separate tracks.
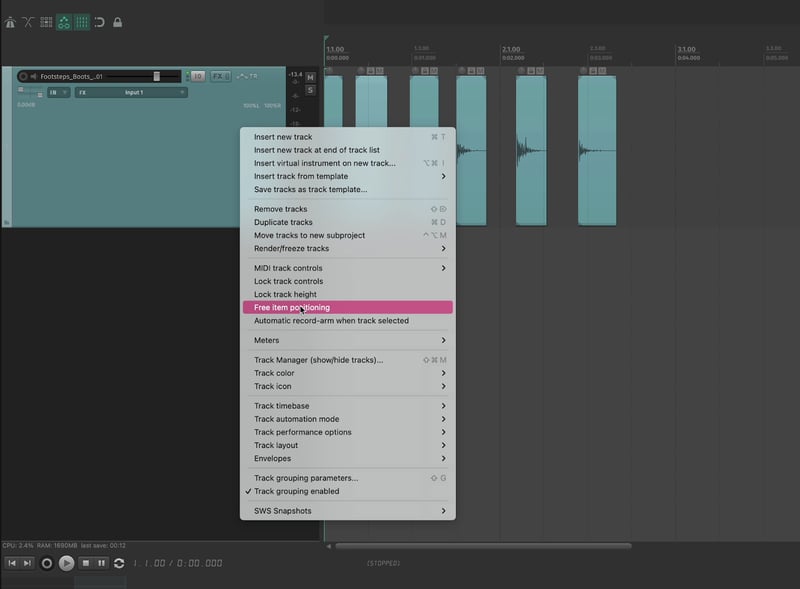
All we need to do to activate it is right click on any of our tracks...
And then click on "Free Item Positioning"
Throw some clips on to that track and see how you can position them basically anywhere!
And lastly, let's talk about seeing all of our regions easily
Okay, many of you probably know this, but it wasn't obvious to me when I first started using Reaper.
Using regions to export files is one of Reaper's best features when it comes to its workflow, but often a lot of our regions can get piled on top of one another and we can't see them all.
It's not super obvious where to go to expand our region view, so what you can do is just go to the top left of the screen, hover over this area in the top left area of our tracks...
Click, drag downward, and bam, you'll expand your region view and be able to see them without all of your regions piling on top of one another!
Alright! That's it for now!
Thanks so much for reading! I hope this was helpful and that this speeds up and enhances your workflows!
And if you'd like even more game audio tips
Then sign up for my newsletter. That's where you'll get access to two free courses to help you network, find work, and get paid for your work in the game industry.
Just sign up here for instant access!

Akash Thakkar is sound designer based in Seattle, Washington, specializing in video games, VR, and AR — Credits include Hyper Light Drifter and Concrete Genie.