New to the world of sound effects? Not to worry – discover best practices with these helpful tips.
It’s not hard to find sound effects online – in fact, the site you’re on right now is chock full of them. Getting them is the easy part; the trickier part is getting them to sound just right in the context of your video, livestream, game, app, or other content.
While there are really no rules to using sound effects, this article will give you some basic techniques to help you get the most out of your assets. We’ll cover how to find the perfect sounds for your needs, edit them to fit, enhance them with effects, and even transform them completely into new sounds.
Searching for Sound Effects
The first step in using sound effects effectively is to find the right sound for a given situation. That might sound like a no-brainer when you can simply type “helicopter sound effect” into your browser, but once you see just how many types of helicopters there are, the range of sounds they each make, and all the available recordings from different perspectives and in varying quality, you’ll likely need to narrow your search to find the right one – that’s where sound effects libraries come in handy.
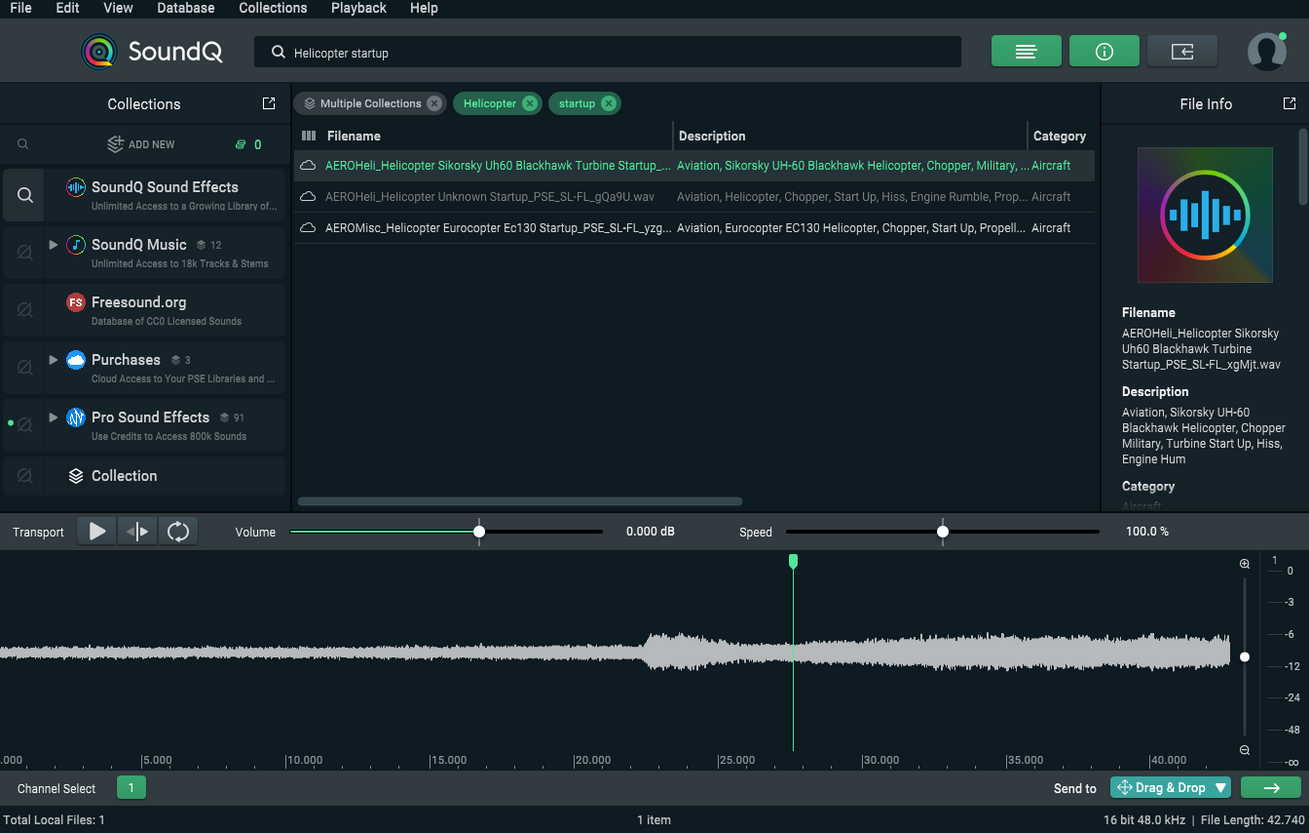
Say you’re looking for the sound of a military helicopter starting up its rotor. First, you’d head to prosoundeffects.com or a sound library software like SoundQ and search “helicopter.” This is where the benefits of working with a reliable source of professional quality sound effects become clear, because each sound file should be cataloged with detailed metadata to help you find the exact sound you need. That way, you can scroll through the results looking for terms like “military,” “rotor,” “starting,” and “startup” – or just search “helicopter startup” to narrow it down to the most relevant results.
From there, you can audition each sound and read the metadata filename or description to learn more about it. This tells you that one of the recordings is of a Sikorsky UH-60 Black Hawk (a common US military helicopter). If you find yourself needing a lot of very specific sounds in a specific category, you can usually find a full sound effects library with dozens (or even thousands) of recordings of a given source – such as King Collection: Aircraft.

Licensing for Legal Usage
It's important to understand that sound effects used in synchronized works are intellectual property – this is where sound effects licensing comes into play. When you buy sound effects or a full library from a sound effects provider, you're actually paying for the license to use those assets in your projects. Using sounds in your projects without proper licensing can lead to issues such as copyright claims and DMCA takedowns, as well as compromised creative product and risking your professional reputation.
All sounds purchased from Pro Sound Effects come with a license for unlimited usage by one user. Visit our Licensing page to learn more about what is covered by default, or if you require a custom license for your use case. This gives you and your clients peace of mind that your projects are covered, and that the sound artists behind these assets that made your job easier are fairly compensated.
Editing and Manipulating Sounds
While most professional sound effects files are ready to use right away, you’ll often find that a bit of editing is necessary to make them blend well with other sounds. You might need to fade out the end of an airplane pass-by or cut an unwanted dog bark out of an ambience recording, for example. Fortunately, splitting, trimming, fade-ins, fade-outs, and crossfades are all common tools in any DAW, NLE, or editing software, so you don’t need any special plugins. Here’s a quick primer on basic editing techniques:
- Trimming and splicing - If you only want a certain part of the sound, simply drag the left or right side of the audio clip to where you want it to start or end. You can also use the scissor tool to cut out a portion of a sound and splice together the remaining sections. For best results, zoom in and make the cut where the waveform crosses the middle line – otherwise, you may hear an annoying click.
- Fades - For extra smooth edits, add a very short fade-in, fade-out, or crossfade to the point where you made the cut. For sounds with long decay times, such as echoing gunshots, use a longer fade-out. When blending one sound into another, such as making a huge applause die down to a trickle of clapping, enlarge the crossfade for a smoother transition.
Layering Sound Effects
One of the most popular sound design techniques is to layer multiple sounds for a more full and complex result. For example, most action movie fight scenes feature punches that sound much larger than life. To achieve this, sound effects editors often craft each punch out of multiple elements: the midrange impact of the fist on the body, a higher-frequency rustle of clothing, and often a short low-frequency thump to convey the power of the blow. This approach creates a full-frequency sound effect that feels visceral and satisfying.
Layering is also great for creating complex background ambience. Think of an airport scene – you’d want to hear the chatter and motion of people, gate announcements over the PA, a turbine engine whirring outside, and miscellaneous sounds like smartphone ringtones, luggage zippers, or whatever else the scene might need.
Here are a few other ideas for creative layering:
- Build a roaring bonfire out of multiple fire recordings plus crackling logs and rushing air
- Craft a sci-fi laser with a charge-up sound, synthesized ‘zap,’ and tingle of electricity
- Layer multiple animal recordings to create monster vocalizations
- Combine various thuds, thumps, and crashes for awesome impact sounds

Processing Sound Effects
You can get even more mileage out of your sounds by applying plugins and other processing in your DAW, NLE, or editing software. Two of the simplest and most-used tools are time-stretching and pitch manipulation, which sound designers use for everything from subtly tweaking sounds to completely transforming them.
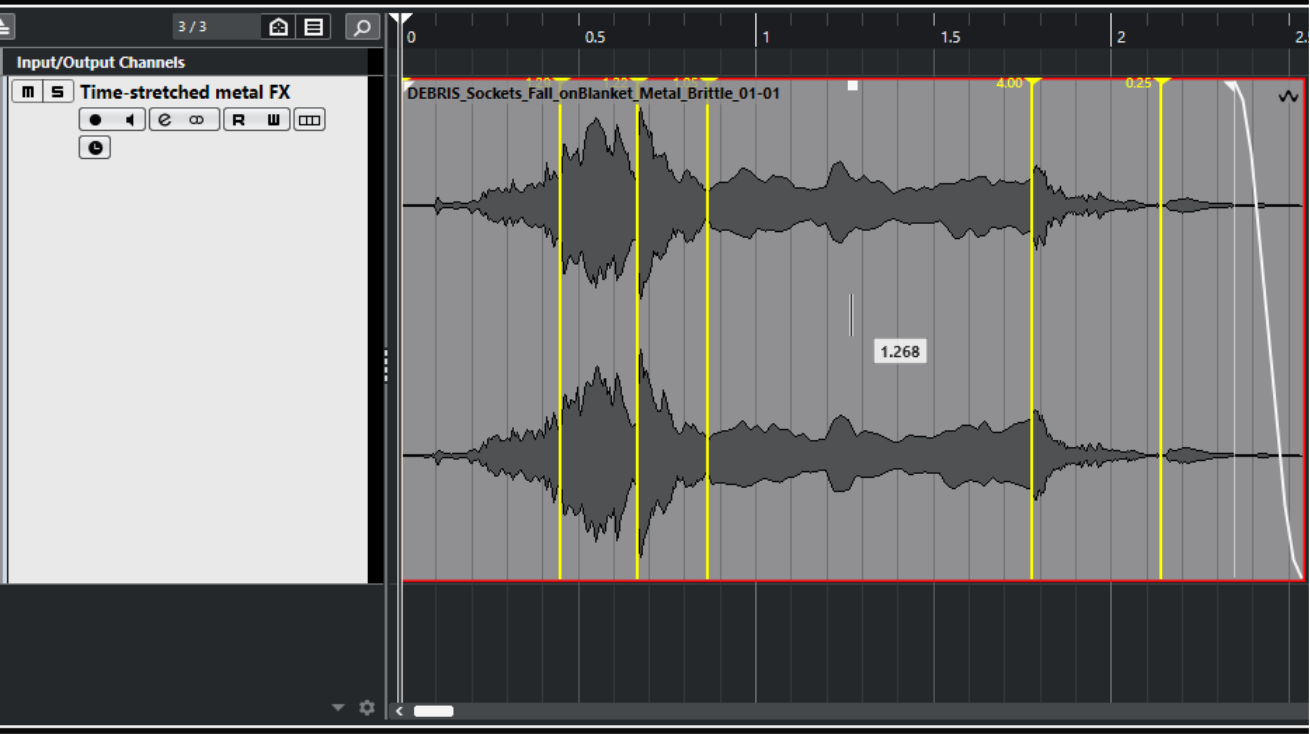
- Time-stretching - By manipulating the length of a sound, you can stretch or compress it to suit your needs. Time-stretching is limited by the sample rate of the material, however – the more samples per second, the more you can slow the sound down without getting digital artifacts. A 96 kHz file at half-speed should sound just like a 48 kHz file, but a 48 kHz file at half speed will be missing half of the information and probably sound strange. There’s effectively no limit to speeding sounds up, though, so you can easily make a longer sound into a short whoosh or impact.
- Pitch manipulation - Altering pitch is incredibly useful for making explosions sound deeper, turning animal noises into high-pitched shrieks, and other creative applications. Just like with time-stretching, the lower limit of pitch-shifting is related to the high-frequency content of the sound – in fact, there are even special microphones that record ultrasonic frequencies up to 100 kHz, which can be pitched down into the audible range. However, the sample rate must be high enough to capture all of this information (the highest frequency recorded is equal to half the sample rate, so recording at 192 kHz will capture frequencies up to 96 kHz, and so on).
Beyond pitch and time manipulation, there are countless other plugin effects you can use to transform your sounds. Other common techniques include adding reverb and/or delay for an angelic or spooky effect, using compression and distortion for a more aggressive sound, or applying a doppler effect to create the illusion of motion. Try different combinations and see what you can come up with!
Sweetening with EQ and Compression
Finally, a little post-processing provides the finishing touch that helps a sound fit in the mix. The most common tools for sweetening are equalization (EQ) and compression, and you might be surprised by how much control these two simple tools will give you.
Here’s an example of when to use EQ: say you stream first-person shooter games on Twitch and want to play an explosion sound effect when you get a new subscriber, but you find that the explosion is drowned out by the midrange-heavy din of guns, grenades and vehicles. To make sure that explosion stands out from the mix, first try cutting out some of the midrange (somewhere between 500–2,000 Hz) with an EQ plugin. Don’t cut so much that it sounds hollow – just enough so that it doesn’t compete with the game sound. Then, depending on the sound effect, you can boost the low frequencies (150 Hz and below) to enhance the bass rumble or increase the high frequencies (above 5 kHz) to help it cut through even more. But remember, every sound is different!
Compression can be used to gently smooth out variations in volume, set a hard limit, or anything in between. For example, voice-based sound effects like crowd walla may need just a touch of compression so that the occasional loud voice doesn’t stick out too much. For this application, you’d want to set a low ratio (2:1 - 4:1) with moderate attack and release times (30-100 milliseconds) to smooth out the sound without the effect being noticeable. Conversely, some sounds need heavy compression to tame large volume spikes. Take a thunder sound effect, for instance – here, you’d want to use a high ratio (10:1 or greater) with short attack and release times (1-15 milliseconds) to reduce the initial crack while leaving the rest of the sound unaffected.
Further Reading
With these strategies, you can make any sound effect fit perfectly in the context of your video, livestream, game, app, or whatever project you’re working on. And if you want to become a real sound effects pro, check out other posts on our blog as well as our YouTube channel for additional resources, tips, and tricks!


