Configure Pro Tools session templates for efficient FX and background editorial.
Templates are a very important part of the sound editing process. When I begin a project, it's essential that I’m not wasting energy reorganizing and rerouting tracks.
Instead, when I begin editorial, I want to focus on the story and realize my ideas as quickly as possible. More generally, software and technology that we surround ourselves with should be set up in a way that gives us a reliable framework in which we can be creative and play with sound, with minimal distraction and technical drudgery.
One big caveat here, you should ALWAYS consult your re-recording mixer for track layout and preferences before beginning a project, and adjust your template and editing style to their tastes. Also note that the FX editing template I will describe is probably best suited for feature films, although a slimmed down version of this could be utilized for short-form or less FX-heavy projects.
I’ll also fill you in on some of my personal preferences along the way, but of course there are many ways to organize a template and it’s ultimately about what works for you and your mixer!
FX Tracks
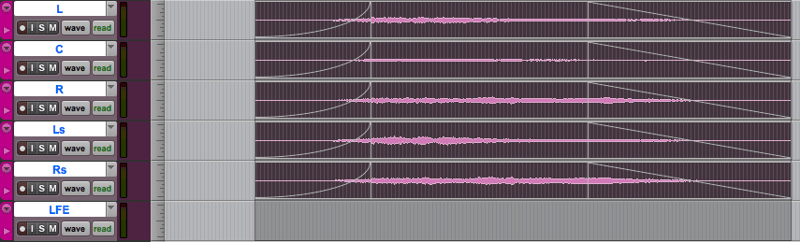
The FX tracks in my template are organized into predubs, or groups of tracks with sounds that make sense to be assigned to a single VCA fader. For instance, my FX A predub typically consists of 16 mono tracks and 16 stereo tracks, which can be adjusted with the “FX A” VCA fader. Each predub has its own VCA fader, and all tracks within a predub will be assigned the same color so they are visually separated. I even like the color of the VCA fader to be set to “none” so that it shows up as black and works as a visual divider:
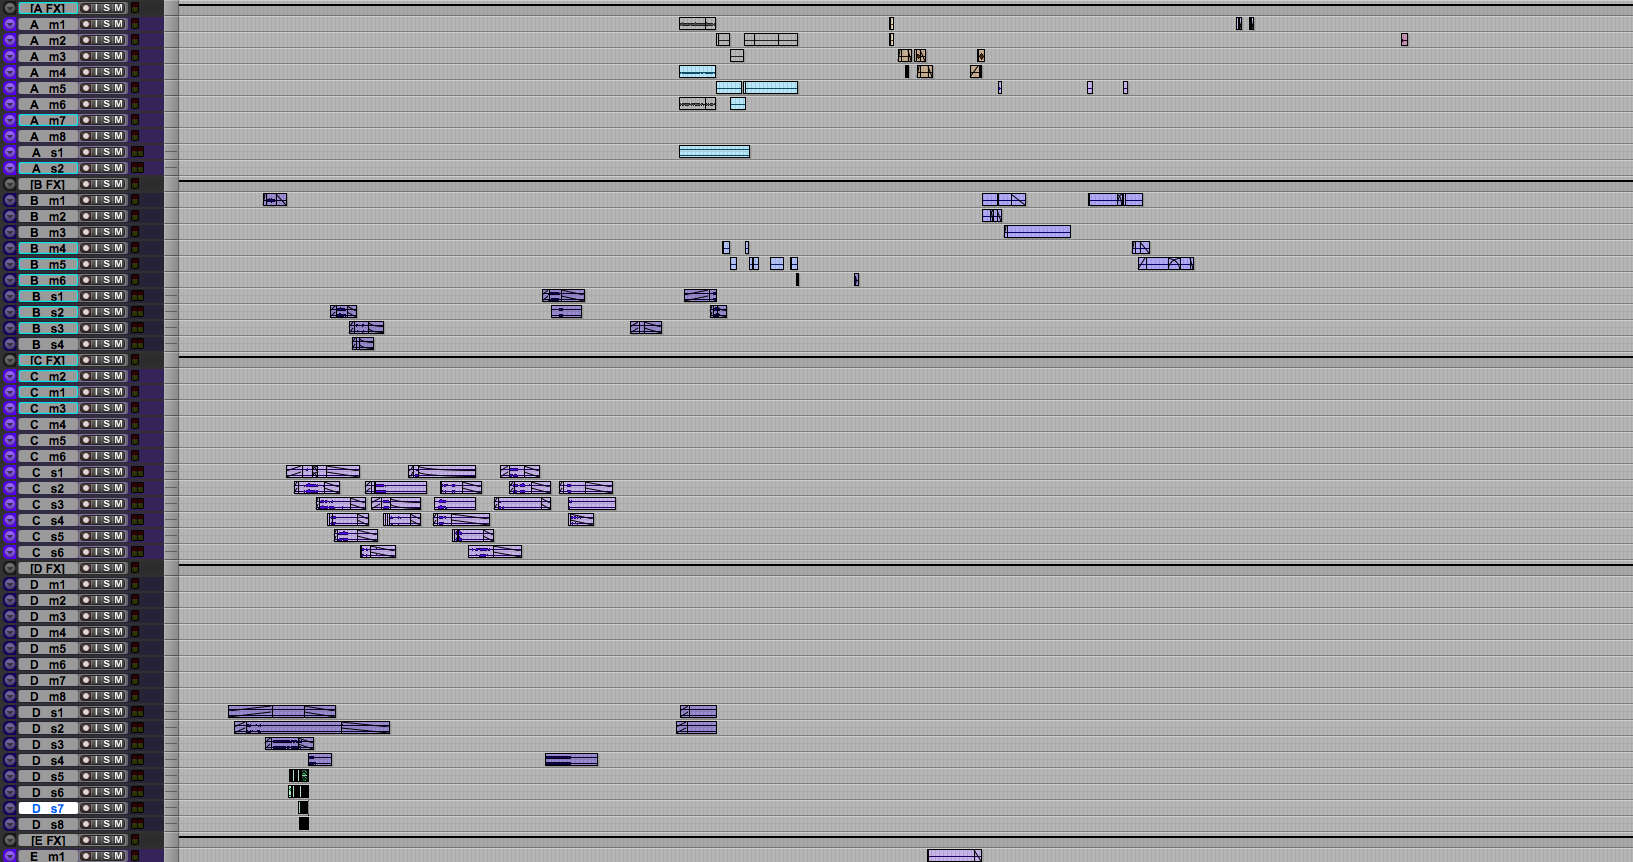
FX tracks names
I prefer a very minimal track naming scheme that isn’t overly confusing when looking at a small display on a control surface such as the S6 or D-Command. For FX, I go with “predub + mono/stereo" - for example:
- A m1
- A m2 ...etc.
- A s1
- A s2 ...etc.
- -
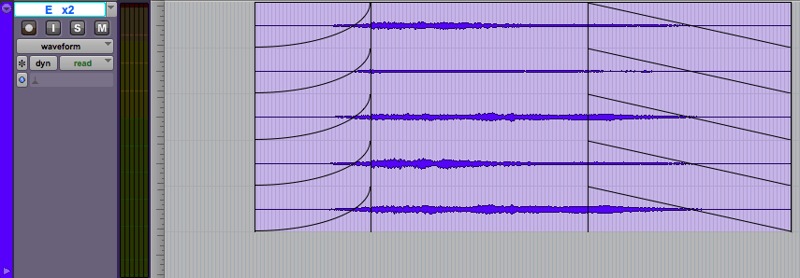
I prefer having tracks separated by format, that way if you need to bring in an additional track, it doesn’t throw off the track name number sequence. For multi-channel recordings such as LCR, Quad, and 5.0/5.1, I use 5.1 tracks and make sure to drag these multichannel clips to the 5.1 track in the correct order (more on this later). Because these 5.1 tracks can be many different formats, I use an “x” in the track title - for example:
- E x1
- E x2 ...etc.
- -
Where should the sounds go?
What sounds go into each predub depends mostly on the project and the mixer’s preferences. But here are a few general guidelines I try to follow:
1. Be consistent. As a general rule, try to keep recurring sounds that might need to be processed or panned similarly on the same tracks throughout the session. For example, if you put gun mechanical sounds in FX B, gunshots on FX C, bullet whizzes and ricochets in FX D, and impact/debris in FX E, try to keep that consistent throughout the session. If these sounds are common enough in the project, it might make sense for them to have a dedicated set of tracks.
2. Consider what the mixer might want on each VCA fader. If you’re editing a complex event with multiple layers that have multiple elements (such as a gunshot or explosion), consider spreading those layers across multiple predubs to give the mixer a VCA for the layers. On the other hand, don’t spread the sounds around too much as a lot of sounds will work just fine on a single VCA fader.
3. I generally like to reserve FX A for Foley-like FX. This way they are in closer proximity to the Foley tracks, and they are less likely to be split out to other predubs, although these sounds occasionally spill over to FX B. I also tend to reserve the lowest FX predub (usually FX E or F) for more design-y elements . Everything else tends to fit somewhere in that diegetic > non-diegetic spectrum.
4. Use your best judgement for when to split out certain sounds to be panned with picture cuts. If you think the mixer might want to do this, go ahead and split sounds to new tracks (possibly within the same predub - this really depends on the situation) and let them decide whether to pan or not. It’s a lot easier to undo this type of thing than to have to create these cuts on the stage!
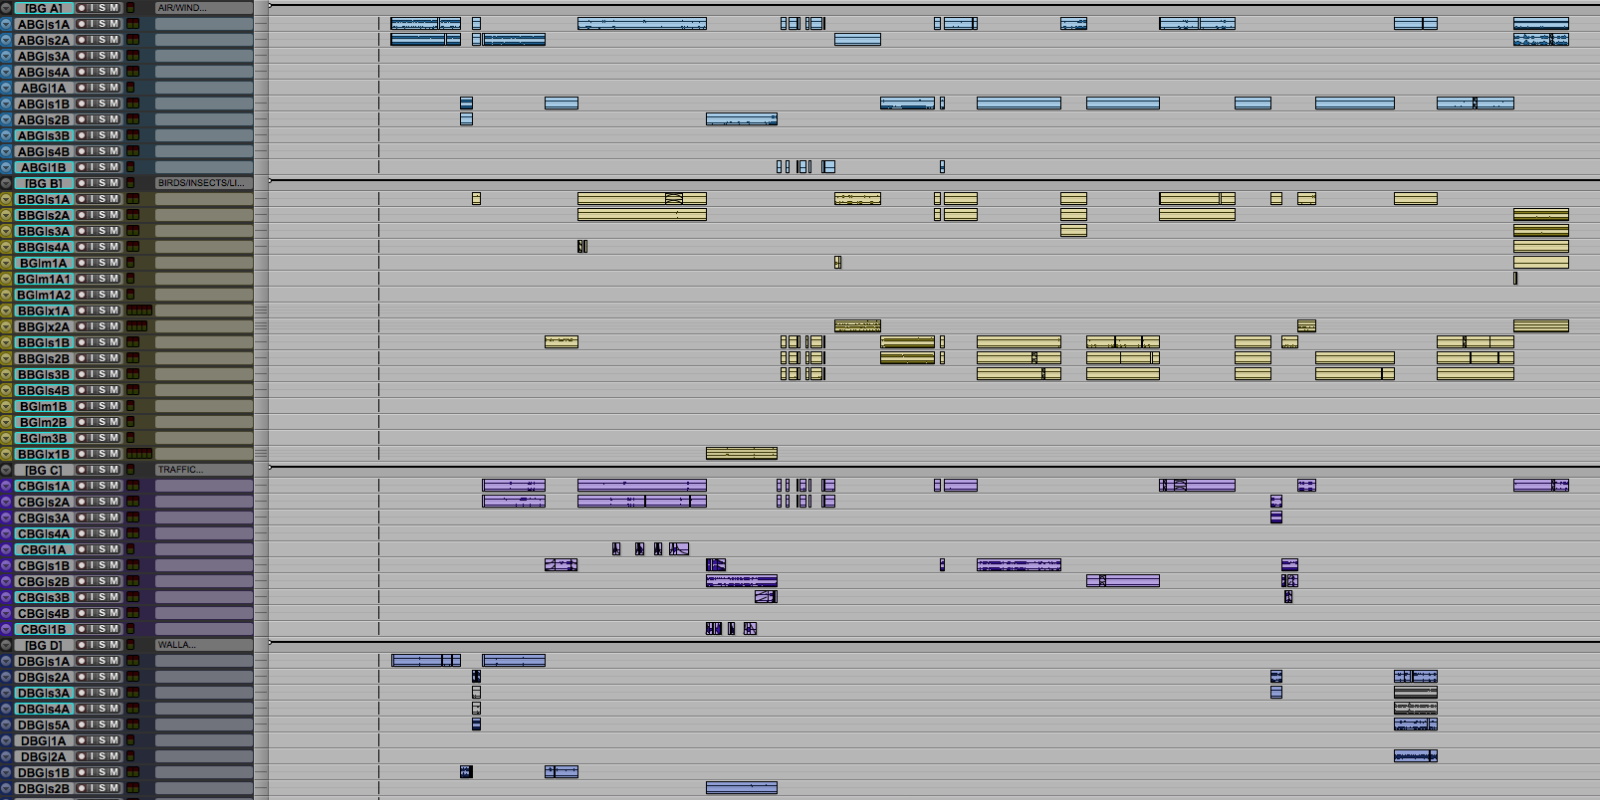
Backgrounds
I believe it’s very useful for backgrounds (BGs) to be separated into a number of predubs based on what many like to call “food groups.” For instance, I generally create a BG predub for:
- Air / Tones / Wind
- Biophony (Insects, Birds, Dogs, etc.)
- Traffic
- Walla
- Miscellaneous Specifics
I also organize my BG predubs to each include an “A” scene group and a “B” scene group to accommodate “checkerboarding” scenes. A project typically begins on scene A, then in the next scene (or when there’s enough of a shift to warrant a change in the BGs) I build those backgrounds in the B tracks within each predub. Then back to A for the next large shift or scene change.
BG track names
The track name in my BG template needs to communicate a lot of information:
1. Which BG predub it’s a part of. I like sticking with letters for this instead of spelling out the food group each time, which tends to be a little more cluttered.
2. “BG” to distinguish it from the FX tracks.
3. Channel format:
- m = Mono
- s = Stereo
- b = B-format (Ambisonics)
- x = LCR, Quad, or 5.0
- -
4. A or B to denote which scene group it belongs to for checkerboarding.
For example, my A BG predub (for Air and Wind) might looks like this:
- A BG | s1 A
- A BG | s2 A
- A BG | s3 A
- A BG | s4 A
- A BG | m1 A
- A BG | m2 A
- A BG | b1 A
- A BG | x1 A
- A BG | x2 A
- A BG | s1 B
- A BG | s2 B
- A BG | s3 B
- A BG | s4 B
- A BG | m1 B
- A BG | m2 B
- A BG | b1 B
- A BG | x1 B
- A BG | x2 B
Number of tracks
My general philosophy is to include the maximum number of tracks you could possibly need in your template, and simply hide the ones that you don’t need or use. For instance, I love having B-format and 5.0 tracks available in each BG group. They stay inactive and hidden most of the time, but they are there when I need them. I hardly ever use 16 mono tracks in FX A, but I’ve come close a few times and having those extra tracks available not only saves a few moments, it keeps me in a creative mindset.
Other considerations
1. Routing: If you need to design a sound using software outside of Pro Tools, how will you route this into Pro Tools? Many use the optical audio out of the Mac and connect that to the optical input on your interface. This certainly works, however I highly recommend trying out Source-Nexus for virtual routing between applications. I have a Source-Nexus AAX plugin on an aux in all of my templates that brings sounds from external apps for monitoring in Pro Tools on HD hardware. I also have this routed to a record track anytime I need to record sound I’ve created in other applications such as BaseHead, Soundminer, and Reaper.
2. iZotope RX: I often clean up raw recordings in iZotope RX as I work, so I always have an instance of RX Monitor on an aux track in my templates.
3. Surround Utility Tracks: I mentioned earlier making sure that your channel order is correct when bringing multi-channel recordings such as LCR, Quad, and 5.0 to a 5.1 track. I do this via 6 split mono utility tracks to make sure the channel order and channel selection is correct before dragging the clips into a 5.1 track.
Creating Your Template
Once you’ve finished tweaking your template, go to File > Save As Template… to create a Pro Tools template that you can store on your system, or you can choose a location for the template. You can also choose to include any media in your session. This can be very helpful especially if you’re working on a television show and want to include recurring FX at the end of the session for easy access in all future episodes.

Templates are essential tools for improving speed and organization. But nothing is set in stone - I regularly make tweaks and adjustments depending on the project. I’m presented with new challenges all the time and my templates are always evolving.
Just remember...ALWAYS consult your re-recording mixer!
Have any tips for creating Pro Tools session templates for sound effects editing? Let us know in the comments!

Article by David Forshee
PSE Library Specialist + Freelance Sound Editor, Designer & Supervisor