
Explore features and tips for Fairlight, the dedicated audio post production section within DaVinci Resolve.
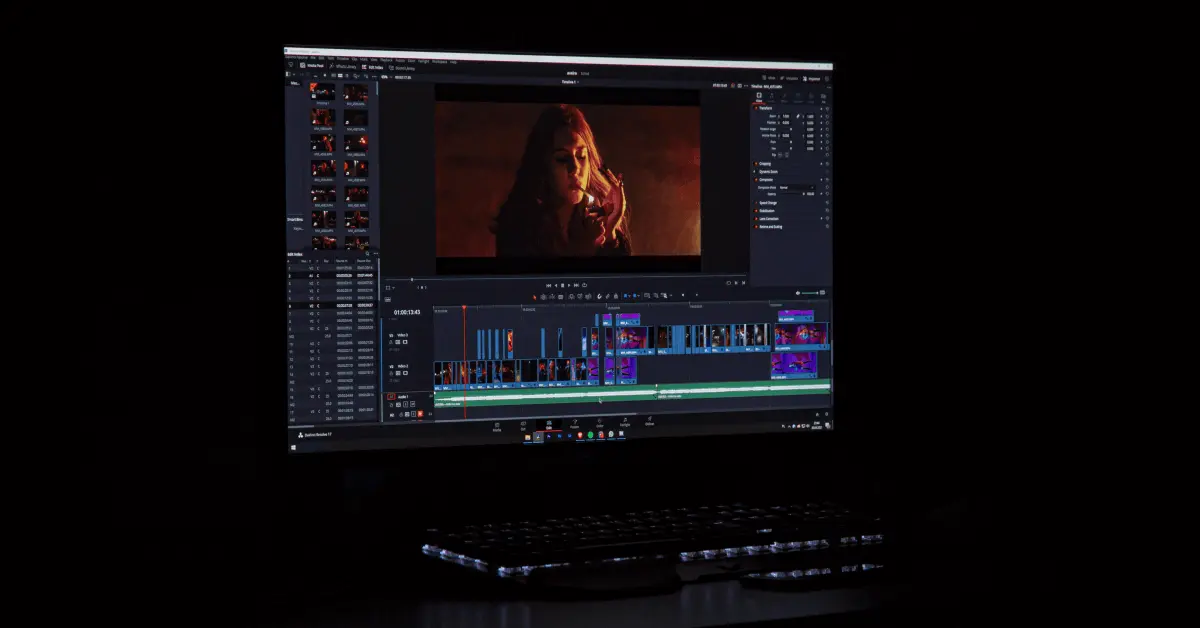
DaVinci Resolve software has come a long way since it started out as a color correction and grading tool. It is fast becoming the video editing program of choice for creators seeking alternatives to industry-leading software like Adobe Premiere Pro, Avid Media Composer, and Final Cut Pro. Resolve is now an all-in-one post production application with powerful video editing features and a full-fledged DAW called Fairlight integrated into the application itself.
Let’s take a look at some of the key audio editing features that make it such a powerful post production application.
1. Start with the basics
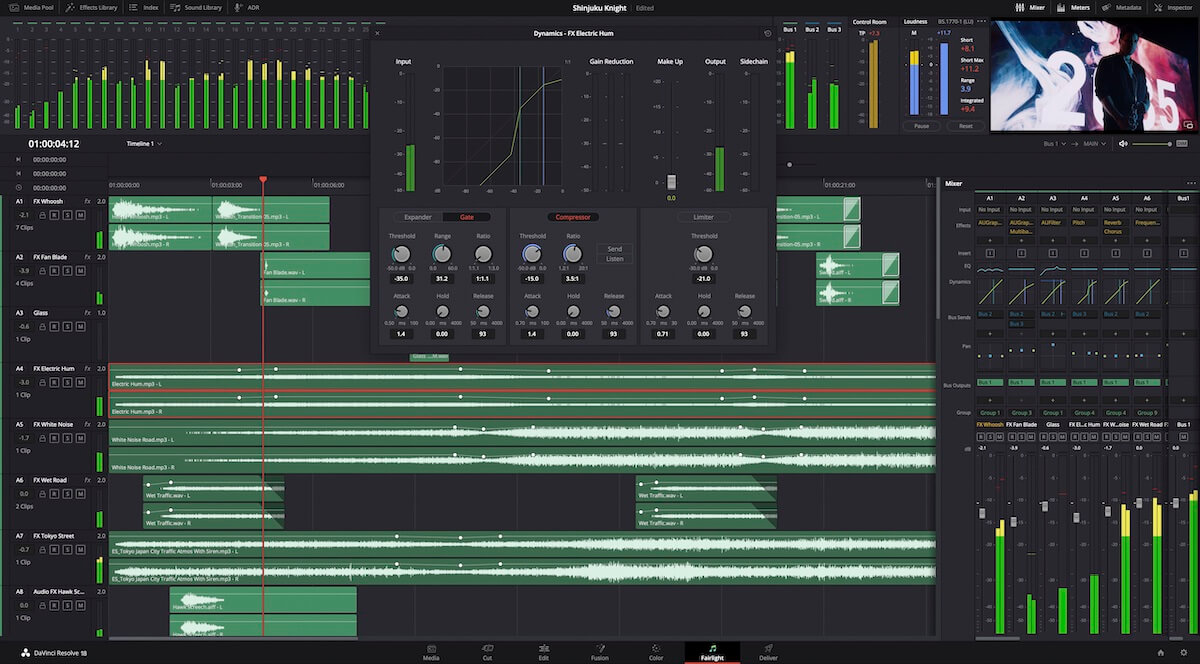
DaVinci Resolve’s audio editor is called Fairlight and it resides on its own "page" where it serves as a fully functional DAW.
Fairlight supports mono, stereo, 5.1 surround, 7.1 surround, Atmos, or Adaptive (1-24 channels) audio. It also allows for simultaneous playback of up to 1,000 tracks (with no additional hardware), or up to 2,000 tracks (when used with the Fairlight PCI Audio Accelerator).
Each audio track corresponds to a channel strip on the Mixer, equipped with a fader, stereo and 3D panners, 6 effects slots for plug‑ins, as well as EQ and Dynamics windows that can be turned on and off with one click, for faster A/B testing.
At the top of the page is the Monitoring panel which provides multiple meters for monitoring track levels, including the crucial Loudness Meter, with presets that help determine if your audio conforms to industry standards.
2. Sync multiple audio and video clips with one click
When you have a large project with multiple video clips that need to be synced to audio that was recorded separately, this one-click sync functionality built in to DaVinci Resolve is a major timesaver as you don’t have to individually select and sync each clip.
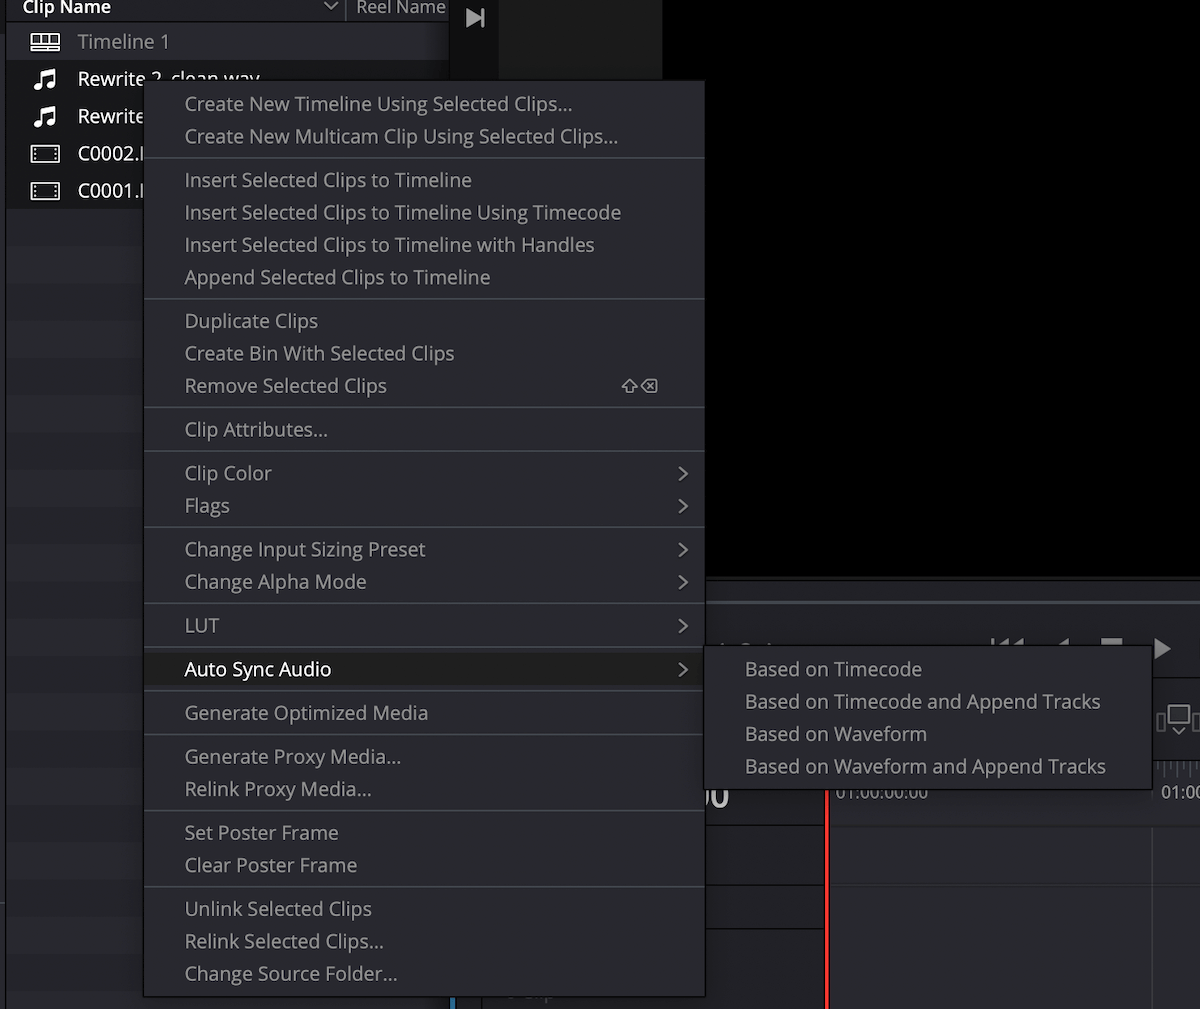
To batch-sync clips, simply import both audio and video into the media pool, select all the clips and right click to choose from one of four options – two based on Timecode and two based on Waveform. If your video clip contains in-camera audio, a good option is to choose Auto Sync Audio > Based on Waveform and Append Tracks. This syncs the external audio to the video clip without replacing the original in-camera audio. When the clips are placed on the timeline, you will see that both the in-camera audio and the synced audio are attached to the video clip. From there, you can delete the original in-camera audio and work with the externally recorded audio.
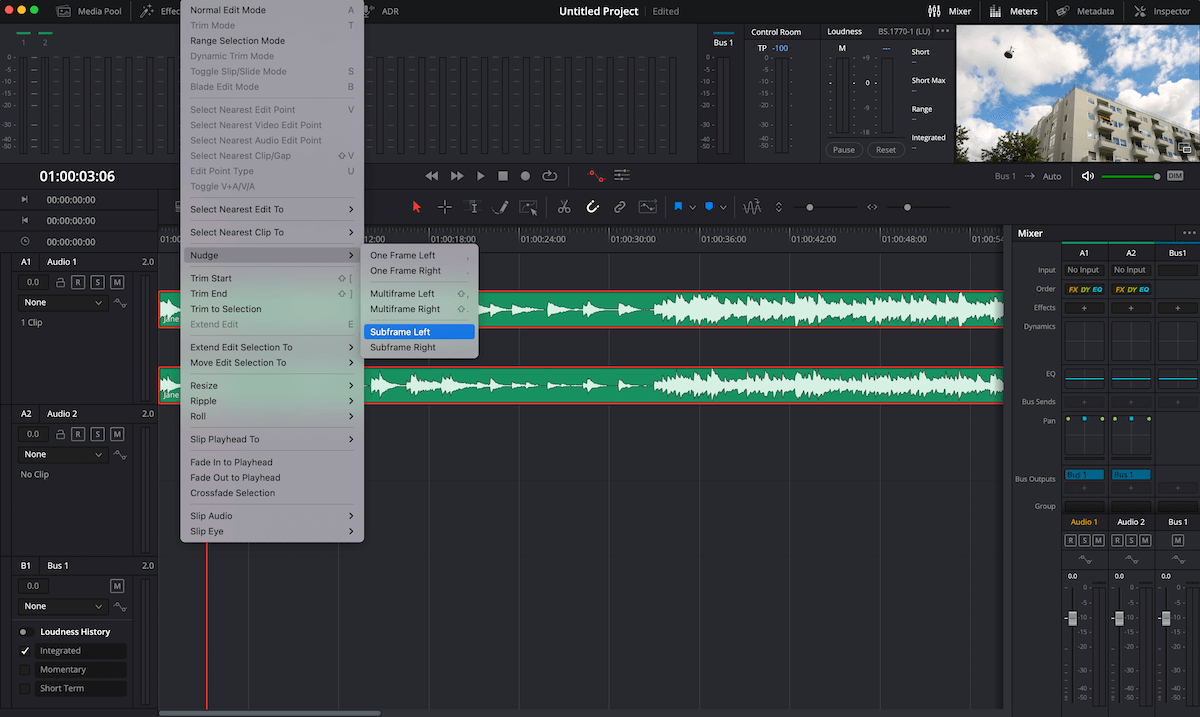
3. Accurately sync audio and video clips using subframe audio adjustment
This feature is a game changer when it comes to syncing audio with video. The frame is a basic unit of video; in most non-linear editors, you can nudge audio clips by one frame left or right to sync with the video. Sometimes, for a variety of reasons, the audio just doesn’t line up perfectly with the video and is off by less than one frame. DaVinci Resolve solves for this by offering the ability to nudge audio by less than one frame for a more accurate sync. This means that you can now move out-of-sync audio into place in subframe increments in order to achieve a more accurate placement.
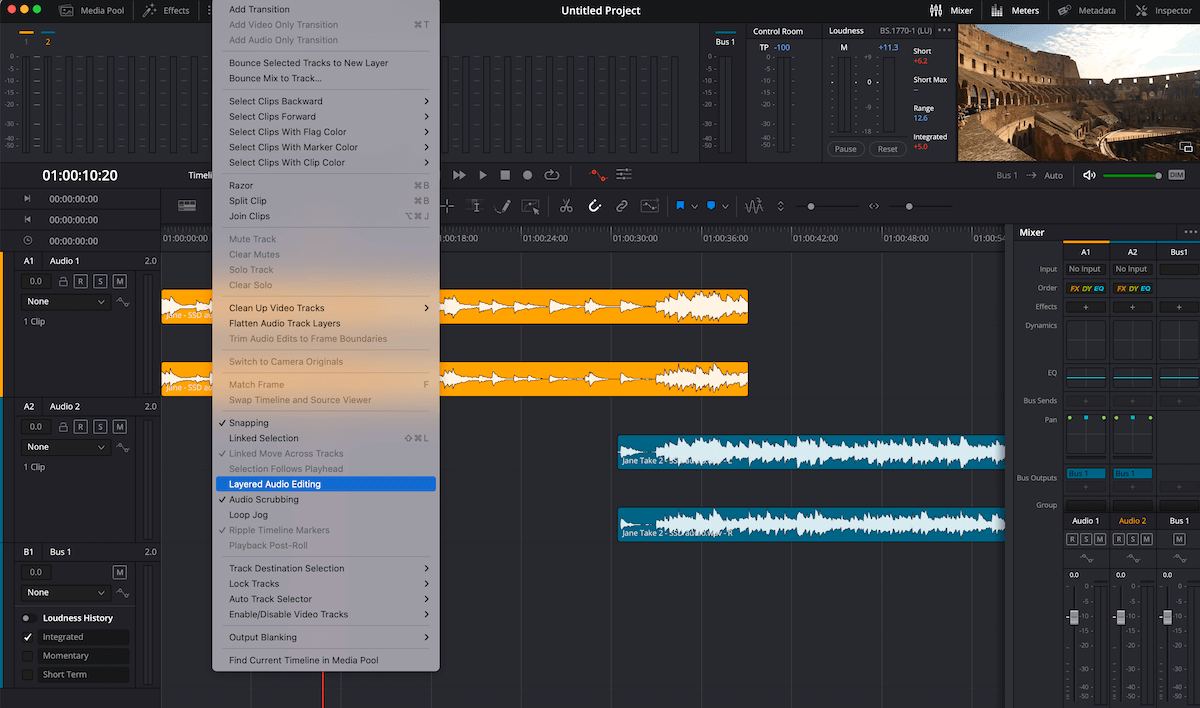
4. Combine multiple takes into one using Audio Layering
When auditioning multiple audio takes, it is useful to be able to stack the takes on top of each other and toggle between them to select the best parts from different takes. This is where DaVinci’s Audio Layering comes in. With this mode enabled, you can superimpose multiple audio clips in the same track. The clip on the top layer will take precedence and non-destructively mute the overlapping section of what’s on the bottom layer. When Audio Layering mode is off, adding a clip on top of an already existing clip will cause the new clip to overwrite the overlapping section of the existing clip. Audio Layering is useful for compositing different takes, auditioning multiple versions of a sound, adding crossfades, and making changes – and going back to previous selections in case the director wants a different option from the take you selected.
5. Easily access your entire sound effects library
DaVinci Resolve lets you access your sound effects library from within the program itself. From an organizational and time management point of view, this is a huge positive. You can access all the sound effects you’ve collected over the years, ready to be incorporated into your edit, as a seamless part of your workflow. A search function lets you find the right sound, audition it and place it in your edit, even syncing it to the current position of the playhead if needed. If you already use sound library software like SoundQ, that’s good news, because it's compatible with DaVinci Resolve and will integrate seamlessly into your workflow.
Create with Unlimited Sound FX & Music

6. Use in-built tools to repair and clean up audio
The Fairlight FX library comes with the tools you need to repair problematic audio including Noise Reduction to eliminate background noise, a De-Esser to tackle sibilance, and a De‑Hummer to remove hums generated by power sources. If you don’t have the budget to buy separate audio repair tools like iZotope RX or Klevgrand Brusfri, you’ll still be able to get the results you need with the in-built plugins that Fairlight offers.

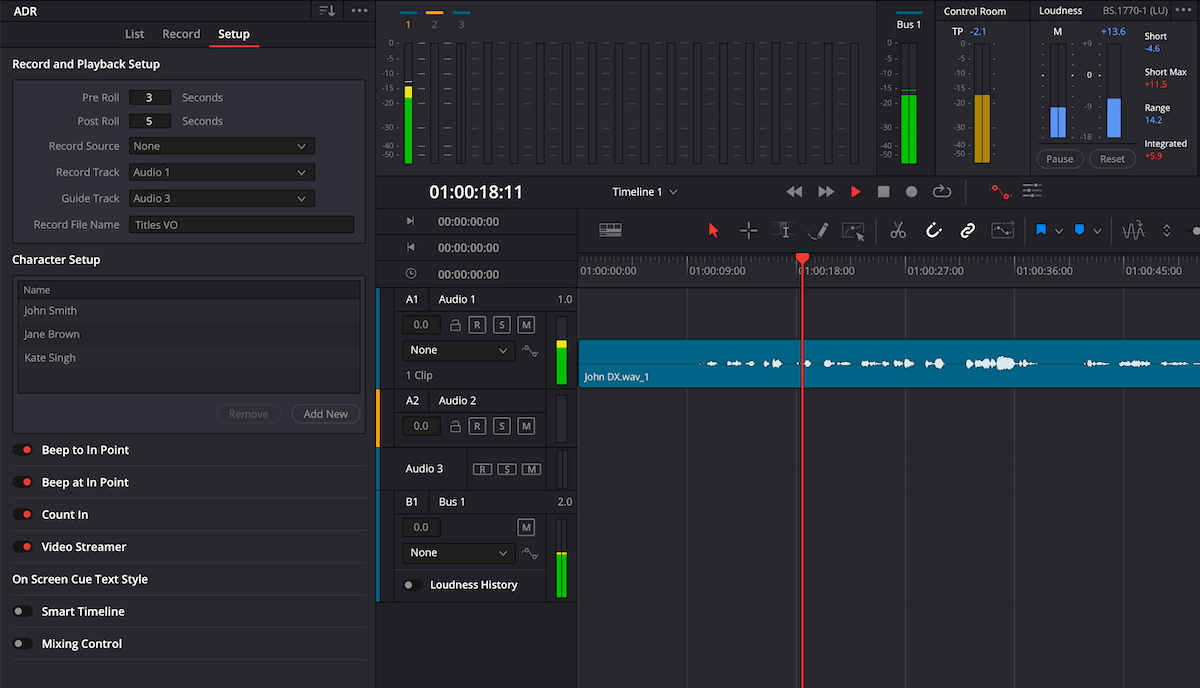
7. Run an Automated Dialog Replacement session within the program
Does your film project need Automated Dialog Replacement (ADR)? No problem, you can now use DaVinci Resolve’s in-built ADR functionality to re-record dialog within the program itself. The panel includes all the tools that a professional ADR session utilizes – pre-roll and post-roll In and Out points, performance guide track, character name setup for cue management, beep countdowns, video streamer for visual cues and the ability to import pre-formatted cue lists.
Final Takeaways
DaVinci Resolve’s Fairlight provides a host of functions to enable you to edit audio irrespective of your skill level. If you’re new to making videos, you can use the basic functions to set up a best-practices workflow and ensure you have quality audio for each project. If you are an audio professional working with video, Fairlight provides all the tools you need to work on the audio for a video project within one application.
DaVinci Resolve is a great option for up-and-coming editors because it has no barrier-to-entry when it comes to price. It sounds almost too good to be true, but DaVinci Resolve is free. While certain color grading functions are limited in the free version, there are no restrictions on the audio editing functions in this version. That alone makes it an excellent choice for anyone who wants to work on their audio skills and explore their creativity in the world of post-production.